How to Connect Store Manager to the PrestaShop Database
Store Manager for PrestaShop is a desktop solution that helps online merchants handle their web store data more efficiently. Therefore, to access and modify the database that is disposed at the web server you need to connect Store Manager application to it.
After you install and register the application (or simply download free trial version to seize Store Manager) you will be prompted to establish connection with your store database.
You can choose between three types of PrestaShop database connection:
- Direct connection
- PHP-MySQL bridge connection
- Bridge Connector module

If you use direct connection, any changes that you implement to the store data will be immediately applied. When you set up bridge connection or bridge connector module, you need to manually sync data between Store Manager: press the Get Data From Web button before adding new information or modifying existing -> a local copy of PrestaShop database will be created -> make necessary modifications -> press the Post Changes to Web button to get them displayed at your online store.
PrestaShop database connection can be configured in two ways: you can either input necessary details manually for the selected type of connection or set up the connections step by step using the Connection Wizard.
Looking For and Inputting Details Manually
If you want to manually input connection details, open Preferences (F12) -> Database Connection. Here you select a connection type and configure required settings.
Direct Connection
To access store data directly, you are supposed to input the following details:
- Host address – this field stands for name of your website, without https://www. prefix (IP address can also be used)
- Port – commonly 3306 port should be indicated here
- Username, password, database name – these credentials are available in settings.inc.php file. To view them you have to connect to the server via FTP client and find config folder. There you will find settings.inc.php file with database name, username and password.

PHP-MySQL Bridge Connection
Once you have decided to set up bridge connection, you should first of all download the latest version of PHP MySQL Bridge or find bridge.php in C:Program FileseMagicOneStore Manager for PrestashopService. Afterwards you are supposed to edit it, namely, change the default username and password to make bridge connection protected. Then the file should be copied to the store root directory via an FTP client.
Respectively, choose PHP bridge connection in Preferences (F12) -> Database Connection and input settings required:
- Bridge URL – provide bridge URL accordingly, that looks like https://www.mystore.com/bridge.php where https://www.mystore.com is your PrestaShop shop URL
- Login, Password – input login and password you provided in the bridge file before.
- Database – input еру name of local database

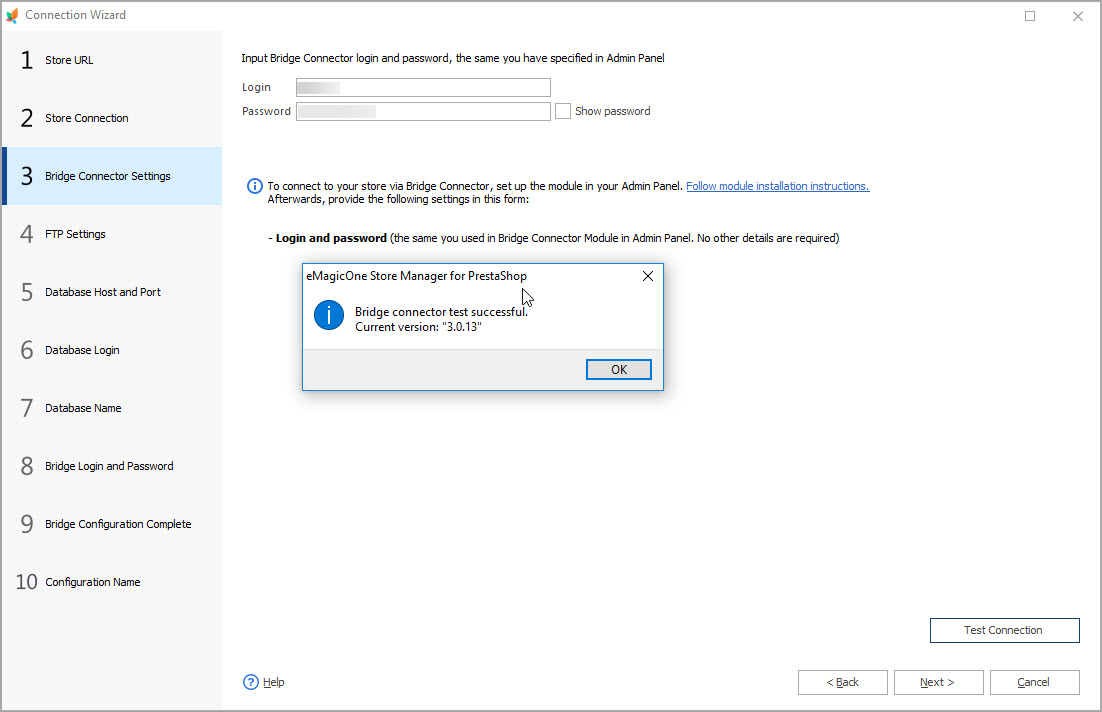
Bridge Connector (also used for PrestaShop Cloud stores)
In case you decide to work with the native PrestaShop Bridge Connector module, you will need to install it from the admin side first. Full guide how to make it can be checked here – How to Connect Store Manager to PrestaShop Database via Bridge Connector.
After it has been successfully installed in the admin, you have to specify the following details in Store Manager, selecting the corresponding type of connection in Preferences window:
- Store address – insert the link to your website;
- Login – fill in the same login you’ve previously specified in the module settings in backend;
- Password – should be the same as you’ve setup in the module in admin.

Setting up PrestaShop Database Connection With the Help of a Wizard
The Connection Wizard makes the process much easier. The Wizard at the top of the same “Preferences” window. After you click on it, the Wizard will offer you two options:“Create New Store Connection” and “Change Current Connection Settings” options.

Once you select the first button, you will receive a new window asking to specify store URL (hit “Test Store URL” to proceed).

Once the action is selected, you will be carried to the next step, you need to select among the available types of connection.

Move to the FTP Settings step and specify the FTP server credentials – server address, login, password and specify store root directory via the browse button.

After you test the connection, hit “Next”. Next steps usually require to press “Next” button. If details you provided are valid and connection to PrestaShop database is established, you will get connection details in the last Wizard window.

Depending on connection type selected you will be guided through corresponding steps comprised by the Wizard.
In order to access your live store data and manage it with Store Manager for PrestaShop, you have to first connect these two destinations. You can accomplish this manually or using the assistant. More details concerning connection wizard are accessible at https://store-manager-for-prestashop-documentation.emagicone.com/home/quick-start-guide/connection-wizard
Tags: PrestaShop database, connect to PrestaShop
Related Articles:
How to Connect Store Manager to PrestaShop Database via Bridge Connector
Install Store Manager Bridge Connector and use this tips to connect your store to the program with this module. Read More…
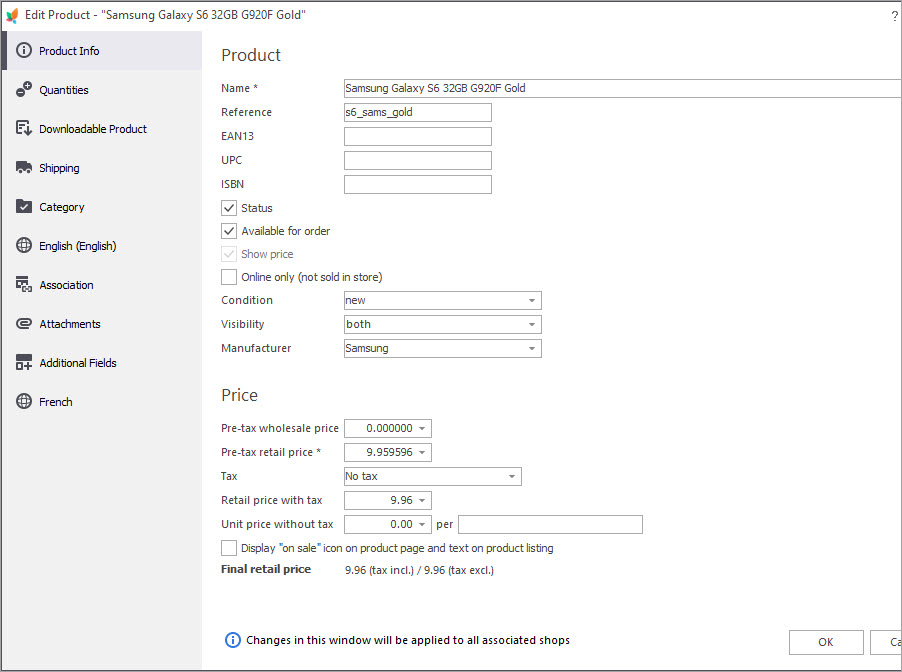
Basic Operations over PrestaShop Products
Discover the ways to perform basic actions over your products including adding new items, modifying or removing them, assigning them to categories etc. Read More…
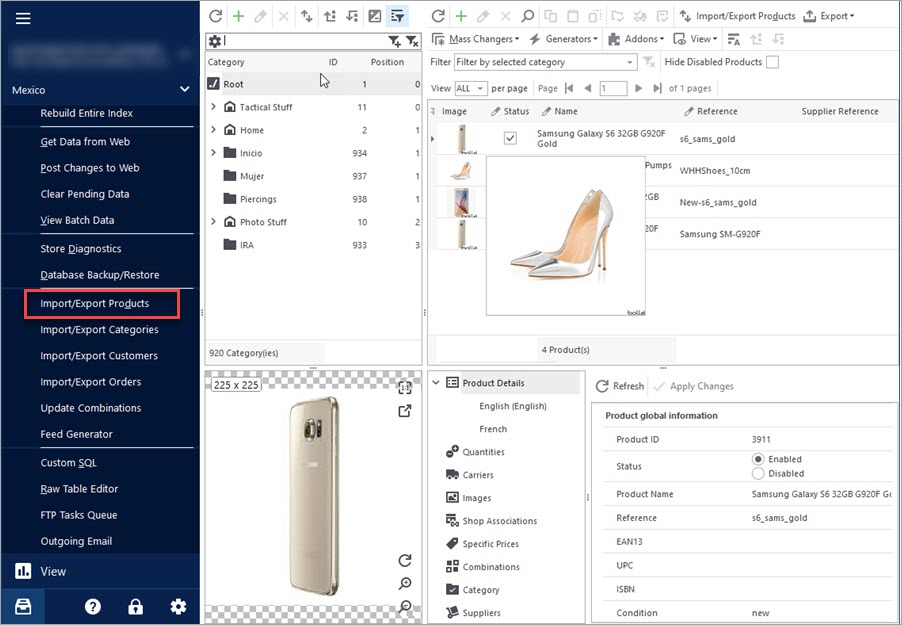
Import Products to PrestaShop using Store Manager
Get insight into main PrestaShop import options including import method, handling products not included in imported file, category options etc. Read More…
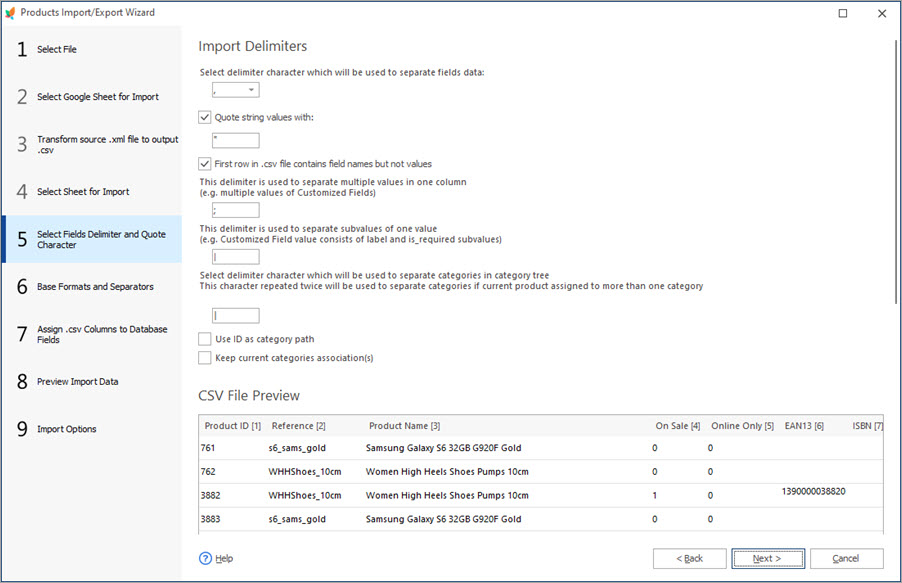
PrestaShop Import – Supported Formats
Discover what import file formats are supported by PrestaShop admin and what import solutions are offered by Store Manager for PrestaShop. Read More…
COMMENTS
Hello!
Thank you for your question.
Most likely, the issue is related to server settings. Please, make sure the FTP details are correct and you can connect with them via FTP-client program (like FileZilla). If the details are correct and you can connect successfully – kindly contact our support with your store configuration file, so we could check your case.


i’m receiving Cannt retrieve bridge data 500 internal server error. what is the issue, could you explain?