Store Manager offers a multi-functional PrestaShop product import wizard. It accommodates to your needs, simplifies data upload, and offers numerous options making the overall process more flexible.
How does Store Manager for PrestaShop and its Import/Export tool simplify the import:
- The wizard includes logically organized steps and tips to configure PrestaShop import.
- There are no strict requirements for the structure of the file and field names.
- The import tool accepts files in different formats — .csv, .xml, .xls, .xlsx, .txt and .ods
- Data can be imported from a local or remote file.
- The PRO version of Store Manager for PrestaShop allows you to import an unlimited number of listings in one go.
- Use the built-in Database Backup tool before implementing any global changes.
Steps to Import PrestaShop Products with Store Manager
- Open Store Manager for PrestaShop and Launch the Import Wizard.
- Select the Import File on Your PC or Specify Its Location
- Specify File Delimiters and Additional Import Options
- Check Date and Time Values Formats and Separators
- Map CSV Columns to the Database Fields
- Select PrestaShop Import Options
- Finish the Import And Check the Products in Your Store
Now we’ll go through each step and figure out how to complete the import successfully.
1. Open Store Manager for PrestaShop and Launch the Import Wizard
When you have Store Manager open, you can launch the wizard either from Tools > Import/Export Products or the top toolbar.

In the welcome window, select “Import”.

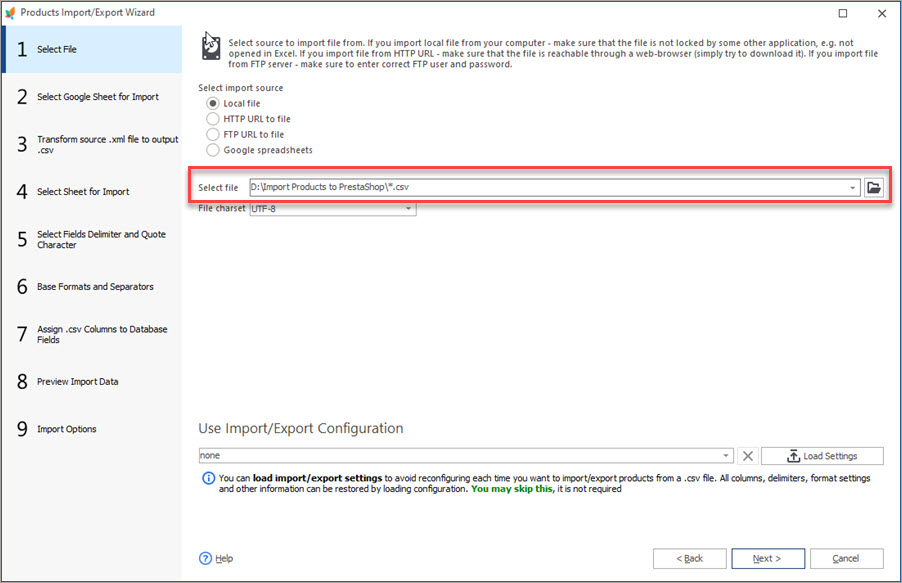
2. Select the Import File on Your PC or Specify Its Location
At this step, you can select the file from your computer, or load it from URL, server, or Google Drive. Check the related article on how to import products from Google Sheet.

3. Specify File Delimiters and Additional Import Options
The next step is responsible for delimiters, images and downloadable product upload. What can be set in this window?

Import Delimiters:
- Select delimiter character which will be used to separate fields data – here, specify the character that separates columns in your CSV file. A preview box below lets you instantly check the result and change the delimiter if necessary.
- Quote string values with – specify the character used to separate strings within your CSV file. The delimiter may be disabled if none of the values are used.
- First row in .csv file contains field names but not values – this option should be unselected if the first row of the CSV file contains data. Otherwise, unchecked this option.
- This delimiter is used to separate multiple values in one column (e.g. multiple values of Customized Fields) – if some of the columns in your file have multiple values in one cell (e.g customized fields, images), specify the characters they are enclosed with.
- This delimiter is used to separate subvalues of one value (e.g. a Customized Fields value consists of a label and is_required sub-values) – this option is used in case your file contains values and sub-values
- Select delimiter character which will be used to separate categories in category tree – if your products are assigned to specific categories, the file should include the Category Path. So, this delimiter is used to separate different categories in the category tree.
- This character repeated twice will be used to separate categories if current product assigned to more than one category – if your products are assigned to different categories, the file should include full category path to each of it.
- Use ID as Category path – this option is used in case you have categories IDs specified in your file (note, that if the file is provided by your supplier, category IDs may be different than at your store.)
- Keep current categories association(s) – if you do not want to unassign products from the categories in your database during import, leave the option checked.
CSV File Preview – allows you to check if the delimiters and other settings specified above are correct:

Images:
- Import images – check this option, if you want to upload images during the import.
- Skip images if product already has image – if the product already has an image at your database, image import will be skipped (new images won’t be imported).
- Default images path – specify the path to the folder with images at your local PC.
- Image delimiter – if a product has several images specified in your file, select the delimiter that is used to separate them.
Downloadable files:
- Import downloadable file for virtual products – check this option only if you want to import downloadable files for your virtual products.
- Default path – select the path to the folder with downloadable files at your local PC.
Attachments:
- Import attachments – check this option if you want to import attachments.
- Default path – select the path to the folder with downloadable files at your local PC.
4. Check Date and Time Values Formats and Separators
These settings are usually taken from the setting in your import file automatically, so you can skip this step and proceed.

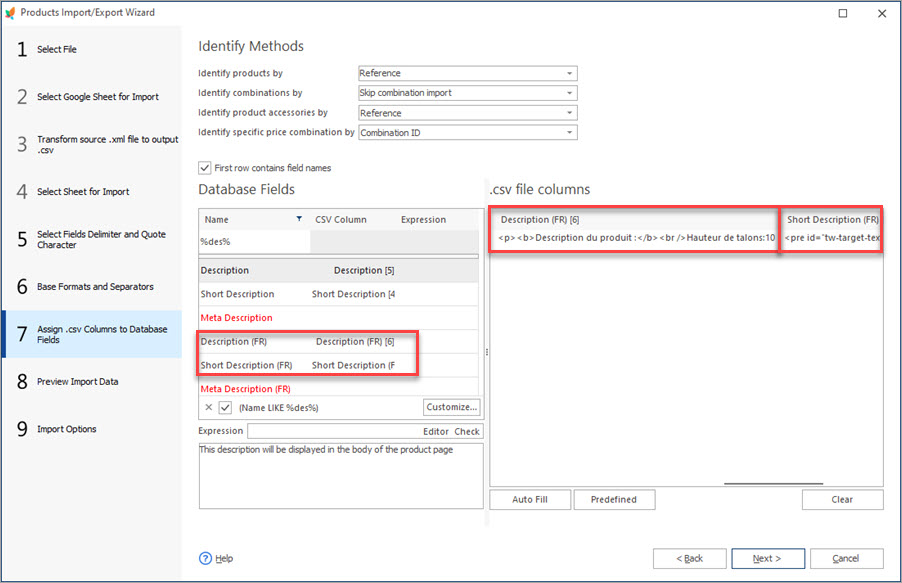
5. Map CSV Columns to the Database Fields
Now, it’s time to map file columns with the PrestaShop database fields. Performing PrestaShop import with Store Manager, you may have any number of columns and you can easily assign them to the corresponding database fields.
The import wizard offers multiple product identifiers. You must select the one you have in the import file. These might be product name, reference and name, ID, reference, EAN, UPC.

If you have product combinations listed in the file, you must consider an identifier for them as well. It is important to select the correct identifier or action on this step because it will influence how combinations will be uploaded.
Check the the options you can use to identify products and other entities during import.
- Product Name
- Refference and Products Name(recommended)
- Product ID (only for update)
- Refference
- EAN
- UPC
- Supplier Refference
Identify products by:
- Combination refference (Recommended)
- Combination EAN
- Combination ID (only for update)
- Regenerate product combinations
- Skip combinations import
- Combination Supplier Refference
Identify combinations by:
- Refference
- EAN13
Identify product accessories by:
- Combination ID
- Refference
- EAN
- UPC
Identify specific price combinations by:
If combinations already exist and you want to update them, you can select combination ID as an identifier
If products do not have combinations or you upload new products with a combinations, you should have combination reference provided in the file and select it as an identifier.
If products you update in the course of PrestaShop product import have combinations, the combinations in the file differ and you select “Regenerate product combination” option, existing combinations will be replaced with the ones, indicated in the file.
If you select “Skip combination import” option, no combinations will be updated or created respectively.
The data you upload to PrestaShop can be adjusted with the help of expressions that lets you bypass manual file manipulations.
6. Select PrestaShop Import Options
- Import Method – select wheather you want to create and update products at one go, only update, or only add products.
- Handling products that are not listed in the file – if your PrestaShop store already has some products that are not included in the file, you can handle them on the go selecting one of the following options: make these listings disabled, set their inventory to 0, or remove from the database.
- Import products with missing identifiers – uncheck the option if you want to skip importing products that do not have all required data listed at the imported file.
- Product Options – this section contains options that allow the application to create new attributes/features/feature values if the appropriate option is checked during import, re-index imported products or delete products data before import (images, specific prices, customized fields, accessories, or unlink products attachments).
- Category Options – if there is no category included in the import file, you can select the category to which they will be placed. Another option lets you ignore the categories that are specified in the file and let Store Manager place them to the most appropriate one.
- Shop Associations – if you have several shops and want to import data into a certain one or ones, you can choose these shops on this step.

Finish the Import And Check the Products in Store Manager
Once you are done with the settings, press the “Import” button to start data upload. Now you can check imported products in the Store Manager products section:

As you can see, Store Manager offers a lot of options to make import really flexible. Adhere to each step accurately to transfer the data properly. Use Store Manager for PrestaShop to upload huge data sets within a short time.
Import Products and Related Details with Store Manager for PrestaShop
Try FREE now
Related Articles:
Get the Sample of PrestaShop Import CSV File
Find out where and how to download CSV sample file for performing PrestaShop import. Get the list of required import columns. Read More…
How to Import PrestaShop Products Into Specific Shops?
Configure settings for importing products into multiple PrestaShop stores at one stroke. Read More…
Auto-Select and Import the Latest File from a Directory
Set automatic selection of the latest file from local or remote directory and import it to your store. Read More…
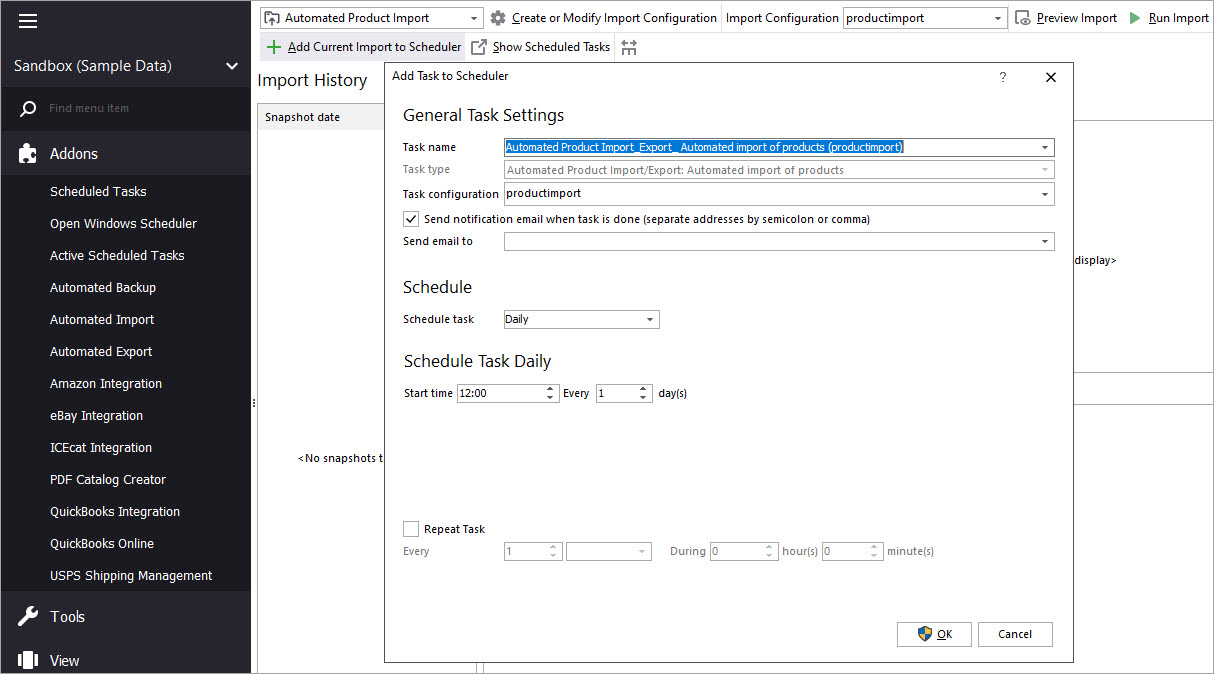
Make Your PrestaShop Product Import Automated
Discover the benefits of automated product import and the way to set it up. Read More…
COMMENTS
Hello, Ronald!
Thank you for your comment.
Store Manager does now have a built-in functionality to convert simple products to product combinations.
Although, we will gladly check your request if there is a workaround, for example via export/import option.
To give you more precise answer, we will need to investigate the exact example of the products you currently have and want to change to combinations.
Kindly contact our support to proceed.
Hello,
we have downloaded one of your demos and we have done some tests with the automatic import of catalogs.
We have in our catalog over 120000 products.
The operations become practically impossible.
Every time we want to program the loading of a price list to update the products, the program makes a copy of the databases and practically everything freezes for over 20 minutes.
We want to buy a license for the possibility to program the automatic loading of the price lists but … in this way everything becomes absurd.
Hello!
Thank you for your comment.
As for the database copying during autoimport – please check if there is no scheduled database backup configured (Store Manager>Tools>Automated Backup), as this might be the reason for the issue. Concerning the freezing – it may depend on the type of connection you work with: for large imports, it is preferable to use a bridge connection. If you are using direct connection please try switching to bridge. If the problem persists, please write to our support team via [email protected] providing a screen or video of the issue.
Hello,
can I upload products directly to my presta using “Manager” or I can do this only by using “Import” button im my admin panel?
Thank you in advance)
Hello!
I’m not sure what you mean by “Directly”. You can upload products to your PrestaShop store via Store Manager. For that, launch the Store Manager application on your computer, then launch the Import/Export Products wizard and follow the steps from the article to upload products. Also, if you’re using the Bridge PHP connection to your store database, press the “Post changes to Web” button for the products to apear on the store. Feel free to contact us if you have any questions. We’ll be glad to assist you.


Hello,
How can i make from multiple single products one combination product ?