No need to tell why export functionality plays not the last role for e-merchant. Retrieving product data sheets for checking the details, sending the file to the supplier, using sheets for further import – all these tasks can be successfully done with the export tool. However, since PrestaShop default functionality has limited export that concerns not only fields but also sources, Store Manager will become a proficient tool to relieve the process. Among the existing file locations products can be carried to, the software offers Google Spreadsheets as well.
PrestaShop Product Export To Google Spreadsheets Steps
To carry out PrestaShop goods to Google spreadsheets, you have to go through several steps of Products Import/Export Wizard.
- Launch the Wizard available in the Import/Export section of Store Manager
- Now hit the “Export” button.
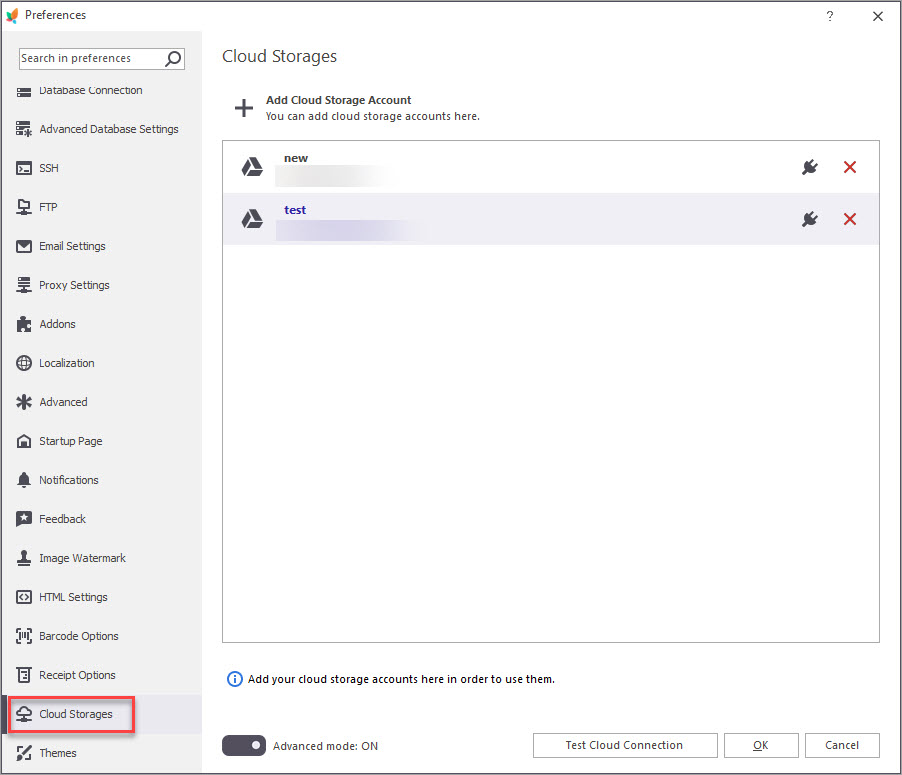
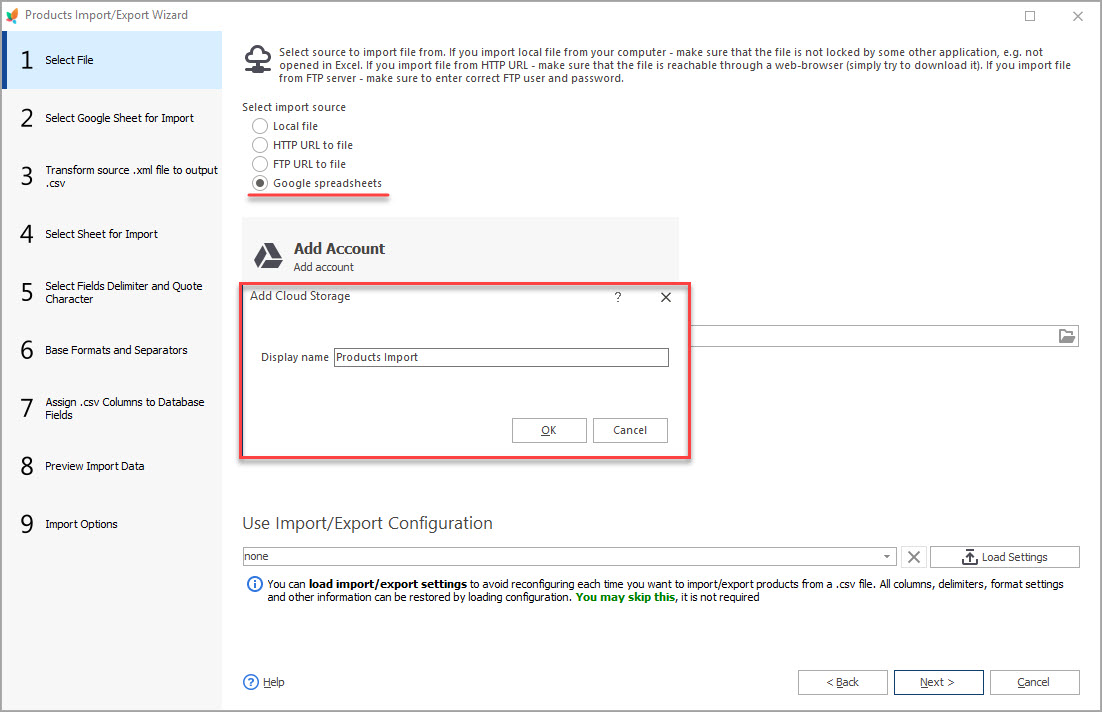
- At the “Select file” step, choose the “Google spreadsheets” radio button export target and you will be offered to add an account and specify its display name. Learn how to generate Google API key to get access to Google Sheets with Store Manager in this article.
- You will be redirected to the Google authentication window that provides your Google account sign in to Google Drive Integration. Selecting the account, you need to grant the addon access to view, modify, create and delete all your files on Google Drive; view and manage your Google Drive files and folders that are open or created with this Integration; view, modify, create and delete your spreadsheets in Google Drive.
- After you have finished with permissions and get a message about successful authenticationn, you can proceed with the export itself.
- Specify export file name or browse Drive Explorer to find the existing file or add a ew one right away.
- Select among the available options:
- replace sheet values – products that already exist in the selected file sheet will be overwritten;
- append to sheet – will add selected products for export to the existing ones;
- insert new sheet – will create a new, separate spreadsheet in the chosen file.

- For more convenient data arrangement, the step afterward offers to select all products, particular categories or use a product filter for merchandise export. Advanced Export Options are also included.
- Further, choose fields delimiter, quote character, images, downloadable files, and attachments (in case you are going to append these details) settings.
- Select the exact fields of PrestaShop products you are going to export to Google SpreadSheets. Store Manager allows opting for a group of fields or the needed ones as well as add expressions on the fly.
- Check the details of the process and select whether to copy the file URL to the clipboard or view the export file.
- After you finished the whole process, you may check the result file on your Google Drive.


In case you need to have product listings appended to Google Sheets on an hourly / daily / weekly basis, Automated Product Export addon already built-in Store Manager will be a suitable tool for this operation. Check the related article on how to create the configuration and add it to the scheduler.
Download trial version of Store Manager and try exporting goods with PrestaShop Google Drive Integration
Try Now
Related Articles:
PrestaShop Google Drive Integration in Store Manager
Discover PrestaShop Google Drive Integration for exporting and importing products to/from Google Sheets. Read More…
Integrate PrestaShop with Google Sheets: Spreadsheet Import
Perform PrestaShop product import from your Google cloud storage with eMagicOne Google Drive Integration. Read More…
How to Upload PrestaShop Feed to Facebook Marketplace
Steps to Generate PrestaShop Feed and Feature Products on Facebook MarketplaceRead More…
Export PrestaShop Products From Specific Categories
Select specific categories from the available ones to make PrestaShop product export more flexible. Read More…
COMMENTS

