Whenever Advanced Stock Management is activated at your store, you have an opportunity to heedfully manage PrestaShop warehouse stock. To avoid stockouts in warehouses you have, respectively, to replenish product quantity in time. Store Manager for PrestaShop introduces such a possibility and allows to update stocks per warehouse in bulk via import.
Below we provide step-by-step guides on the whole process of update PrestaShop stock in warehouse procedure performed with the Store Manager for PrestaShop.
Update Warehouse Stock: Pre-Import Tasks
If you haven’t installed Store Manager yet, download the free trial and connect the application to your store database using the wizard inside. Read about other Store Manager tools to simplify and speed up PrestaShop store management
In order to import quantities to warehouses, you must get acquainted with file patterns. Let’s have a look at the sample extract and analyze the file structure.

*Required Fields:
- Product identifier – in the process of update PrestaShop stock in warehouse procedure fulfilling you have to identify products using one of the suggested identifiers (reference, ID (update only), reference and product name, EAN, product name). Make sure the identifier is present in the file you use for import.
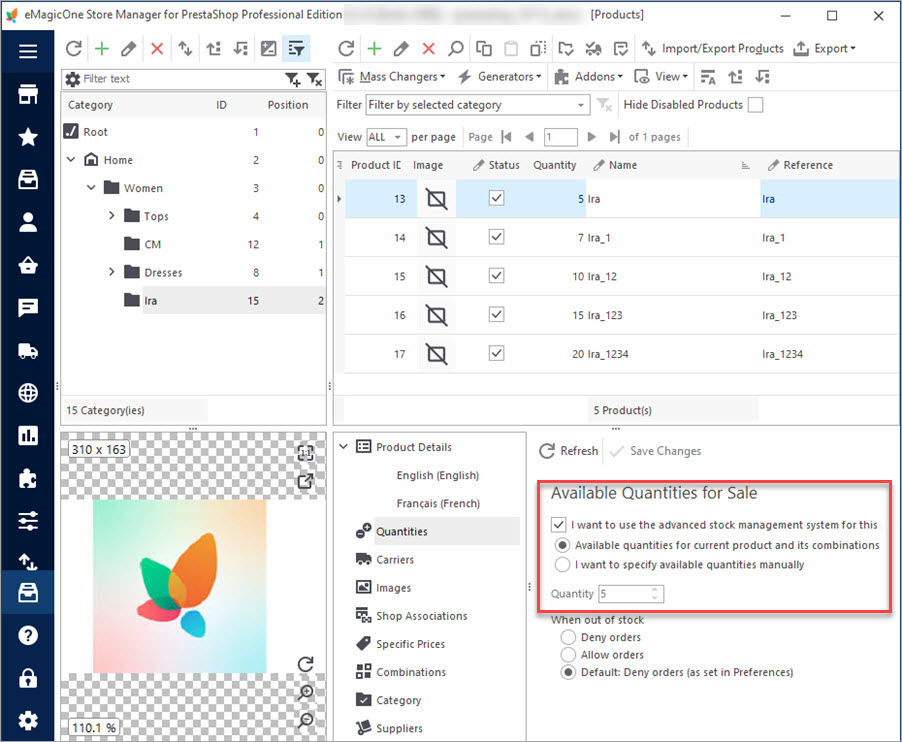
- Advanced Stock Management – assign the product to ASM indicating 1 in this field.
- Depends on stock – this option should be enabled for products if their stock is based on a warehouse. Specify 1 for each product in this field.
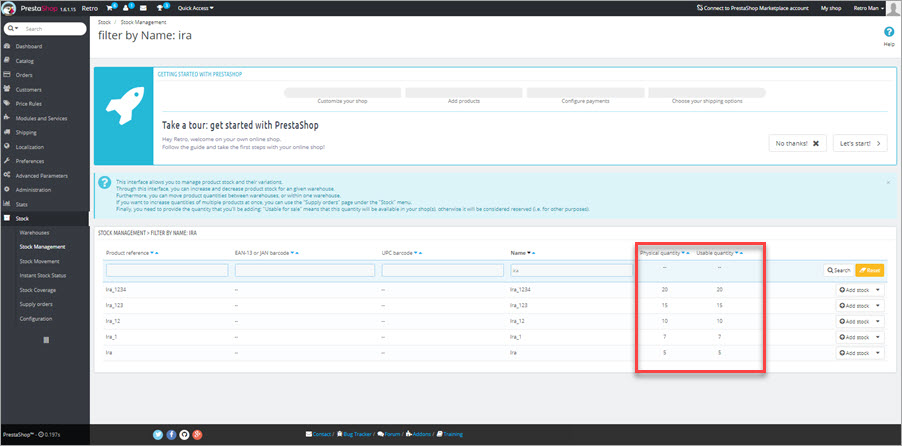
- Warehouse – specify warehouse, the stock will be updated in, for each product in the import file. Each product takes a separate row in the import file if you update the quantity for one warehouse only. Whenever an item is assigned to several warehouses, their names and stock are indicated in the next rows.
- Warehouse quantity – provide usable quantity in the file.
Enumerated fields are responsible for stock update, thus if you update existing products, you can import these details only. Additionally, we have category, price, status, position, manufacturer. You may import any product related details as well.
You can get a file template by exporting existing products or downloading a sample file Get File!
Import Guidelines
Store Manager for PrestaShop import tool is packed with features that are specifically designed to make managing your products a positive experience instead of a hassle.
In order to update PrestaShop warehouse stock, you should run the usual data transfer via import. All the import peculiarities, recommendations and instructions are outlined in this article – PrestaShop Import: How to Perform Product Upload from CSV File to PrestaShop. To help you successfully update stock, we mention import wizard settings you should pay attention to.
1. Matching Import Fields.One of the configurations preceding data input through import is fields associating. Set correspondence between database fields and .csv file columns. Make sure details, responsible for PrestaShop warehouse stock update, are linked as well and correct identifier is determined.

2. Specifying Import Options.
The last step of the import wizard offers you multiple configurations to adjust. Determine the import method, product and category options if necessary.

Store Manager for PrestaShop eliminates all the hassles of daily routines and makes inventory management fluent.
Update PrestaShop Warehouse Stock FREE with Store Manager Update Stock Now
Related Articles:
How to Set Up PrestaShop Advanced Stock Management
Activate PrestaShop Advanced Stock Management option, add warehouses and assign products to them manually or in bulk. Read More…
How to Enable Advanced Stock Management
Find out how to bulk add products to Advanced Stock Management system and what this system involves. Read More…
Products Are Out of Stock after Enabling ASM
Why products become out of stock and how to fix it? Read More…
How to Transfer Stock Between PrestaShop Warehouses
Get detailed guides on how to smoothly transfer inventory to another PrestaShop store. Read More…
COMMENTS
Bonjour Michael!
Merci pour votre commentaire.
Il peut y avoir plusieurs raisons à un tel problème. Veuillez contacter notre centre de support via Live Chat (cliquez sur l’icône Live Chat dans le coin inférieur droit) pour que notre responsable du support puisse vérifier le problème de plus près et vous assister à cet égard.


Bonjour, comment fait-on lorsque l’on a des déclinaisons! J’ai créé le fichier avec la colonne nom du produit mais aussi une colonne avec ID de la déclinaison. L’importation fonctionne pour les produits sans déclinaison, mais lorsque je déroule les menus des produits avec déclinaisons, les quantités ne se sont pas importées…