When a customer for some reason decides to return a product back to your store and such option is available in your store, you have to create a product return on Prestashop back office. After you have received the returned product, you should send the confirmation to the customer that the product is accepted back. Such confirmations are called PrestaShop credit slips.
PrestaShop Credit Slips: How to Create One?
- From admin dashboard expand ‘Orders’ dropdown and select ‘Orders’ settings.
- From the list of orders select the one that you want to modify by clicking on it.
- Press on ‘Return products’ button. You will be transferred to the list of products contained in the order.
- Check the box in the ‘Return’ column.
- To create a credit slip, check the corresponding box in the bottom of the product page.
- Re-stock option – allows PrestaShop to update the stock for the returned product and make it available for sale
- Generate a voucher – allows to create a voucher for the amount of the selected products.
- Repay shipping costs (appears after you check Credit slip box)
- To finish the product return, press ‘Return products’ button.
- To find the generated credit slip, go to Orders => Credit Slips. To download PrestaShop credit slips as PDF document, press the corresponding button.


Besides credit slips, there are a couple of other options including:
In case the product was partially paid by a voucher, it is possible to include / exclude the amount of voucher or set a custom amount to be refunded.

Customize and Bulk Print PrestaShop Credit Slips with Store Manager
Store Manager allows to customize credit slips by changing its design or its whole structure. You can add your logo or change colors etc.
To start editing the document, go to ‘Credit Slips’ tool under Customer Service section and press on ‘Credit Slip’ button. To activate the button, select an order, or highlight a couple of orders.

From the editor toolbar select a necessary action:
- Print the credit slip
- Send credit slip by email
- Change the documents dimensions
- Modify credit clip design

Generated credit slips can be also printed in bulk. You just need to highlight necessary slips and press ‘Credit Slip’ button. To bulk print the slips, press on the printer icon and configure the printing settings.

Customize and bulk print PrestaShop credit slips for free – FREE TRIAL
Related Articles:
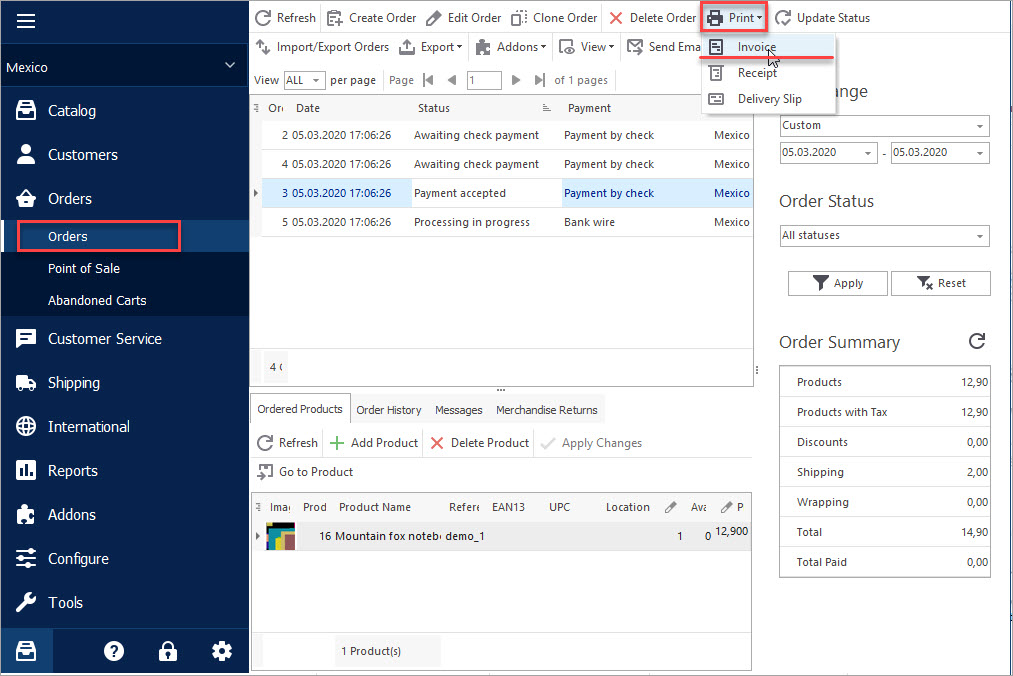
Print PrestaShop Invoices/Receipts/Delivery Slips
Find out an easy and quick way to print your POS materials via Store Manager. Read More…
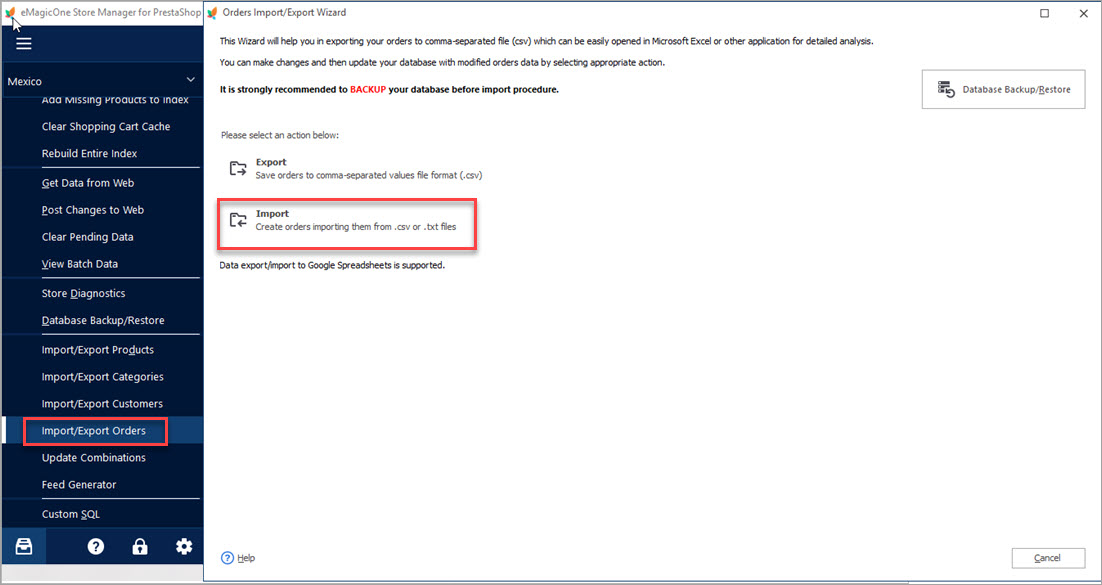
How to Import Orders to PrestaShop
Find out what should orders import file include and how to configure it’s upload settings. Read More…
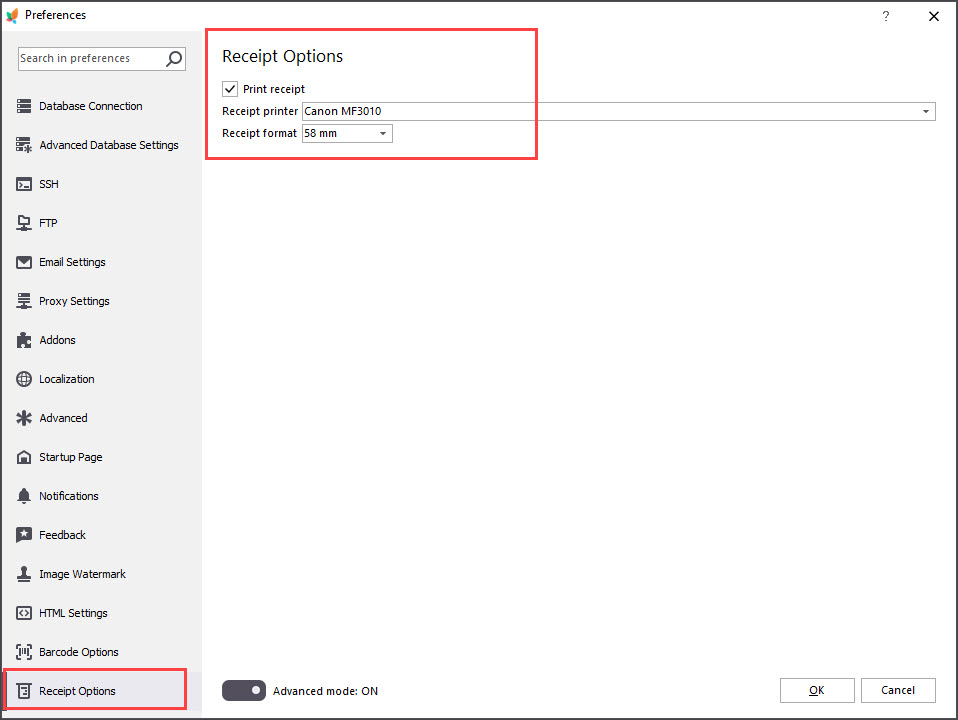
Print PrestaShop Receipts via Till Printer
Check the way to print PrestaShop till receipts in few clicks. Read More…
How to Modify PrestaShop Invoice?
Customize your PrestaShop invoice changing its logo, layout etc. Read More…
COMMENTS

