Barcodes can be found on each product. If you look into your fridge or pantry right now, you will find that just about everything you bought in a store has a bar code printed on it.
What are Barcode Labels?
PrestaShop shipping labels are merely a number of small horizontal lines with a number under each. They hold a lot of data to identify products. This information can be read and decoded with a barcode scanner.
Why to Use Barcodes?
When scanning a product at cash register there appears important info, which is usually product name and price. Thus, this speeds up the procedure as you do not have to manually input the details.
For businesses however, barcodes play even more critical function for they are used to maintain a proper inventory tracking. Product labels ‘communicate’, since they convey products branding and sales message. That is why more and more merchants are choosing barcode labels that can be printed or scanned for fast product identification.
Types of PrestaShop Shipping Labels
Barcode labels can be used for inner purposes, like easier checkup of goods, as well as for external ones – delivery to your clients.
In both of these cases you can use different labels with different info. For your own purposes you can use labels that suite your needs, there are no specific requirements. However, when it comes to packages shipping, you need to create professional-looking labels with nationally-standardized barcode used.
Barcode labels sticked on products have special numbers on them. These are not just random digits, this is a code assigned to product in appropriate government institutions. The code given to a product is unique and is used for product identification worldwide. It holds the info that helps to retrieve products’ origin. If you input the code in Google search, you will receive results concerning the item the code is assigned to.
International codes used for barcodes can be different – UPC, EAN13, ISBN or other standard number depending on your needs and location.
How to Generate and Print Barcode Labels
Store Manager for PrestaShop allows you to generate barcode labels based on the product EAN13 and UPC codes (these fields should be filled for the product).
You can create labels for products and combinations. Let’s start with generating PrestaShop shipping labels for products.
How to generate PrestaShop barcode labels for simple products
The procedure can be performed in 3 steps.
Step 1. Open Store Manager for PrestaShop, go to the Products section and select products in the grid.
Step 2. Right-click on any of selected entities to call a context menu. In the menu, go down to the ‘Reports’ and select necessary option – Products Barcode Labels (EAN13) or Products Barcode Labels (UPC):
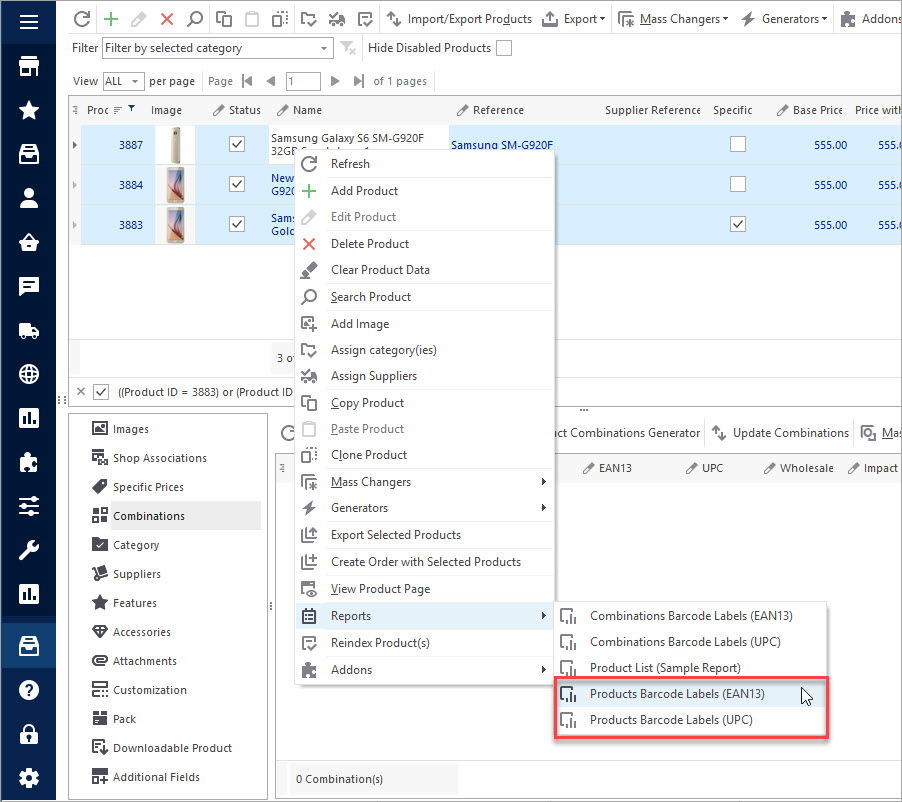
Let’s assume you want to create labels with UPC barcodes. After you click this option the sheet with labels will be generated.
Step 3. Choose your further actions by clicking the appropriate icon on the ‘Reports’ toolbar or in the context menu. You can do the following:
- print the sheet at once;
- save the sheet in any of the offered formats: .jpeg, .pdf, etc;
- edit the design of the labels and store it for future usage and other.
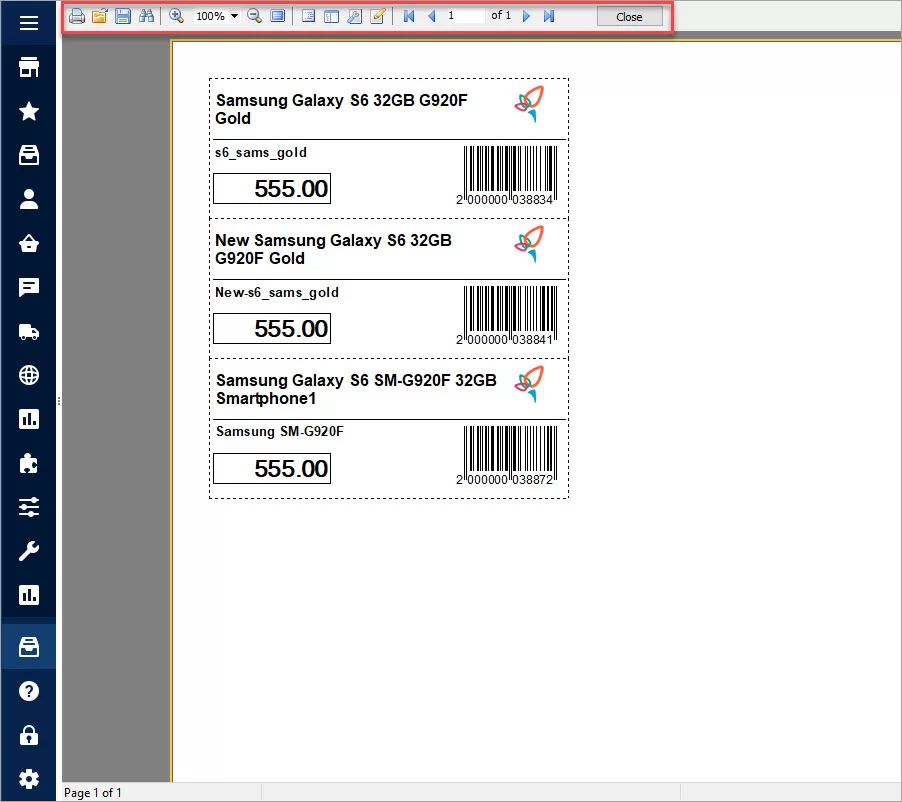
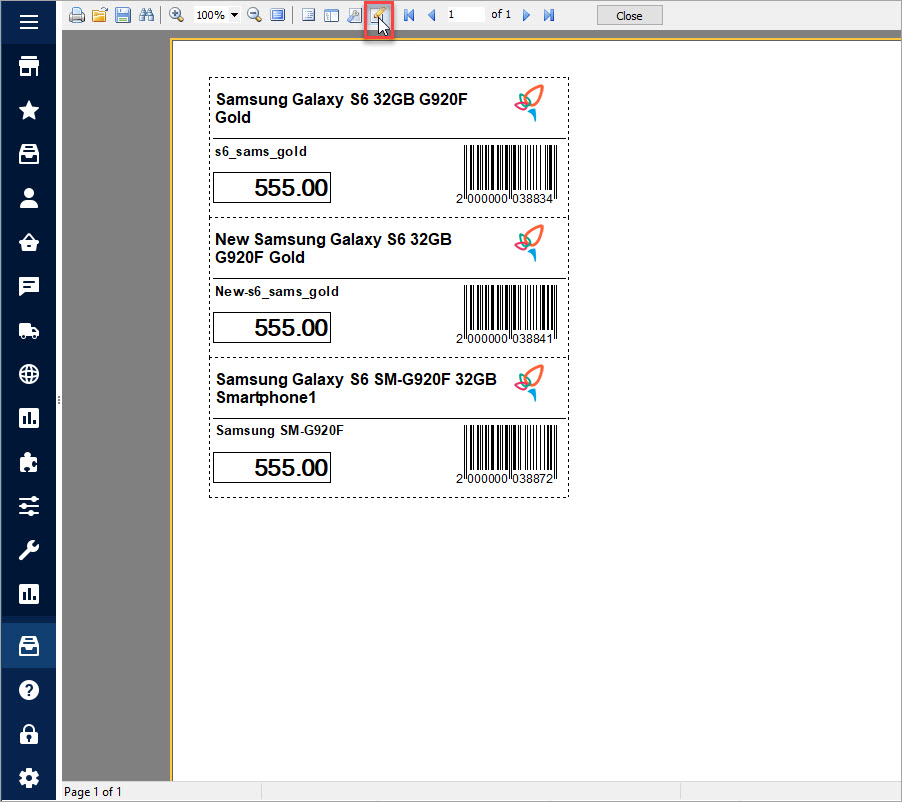
If you want to edit the look of the label click on the ‘Edit page’ icon:
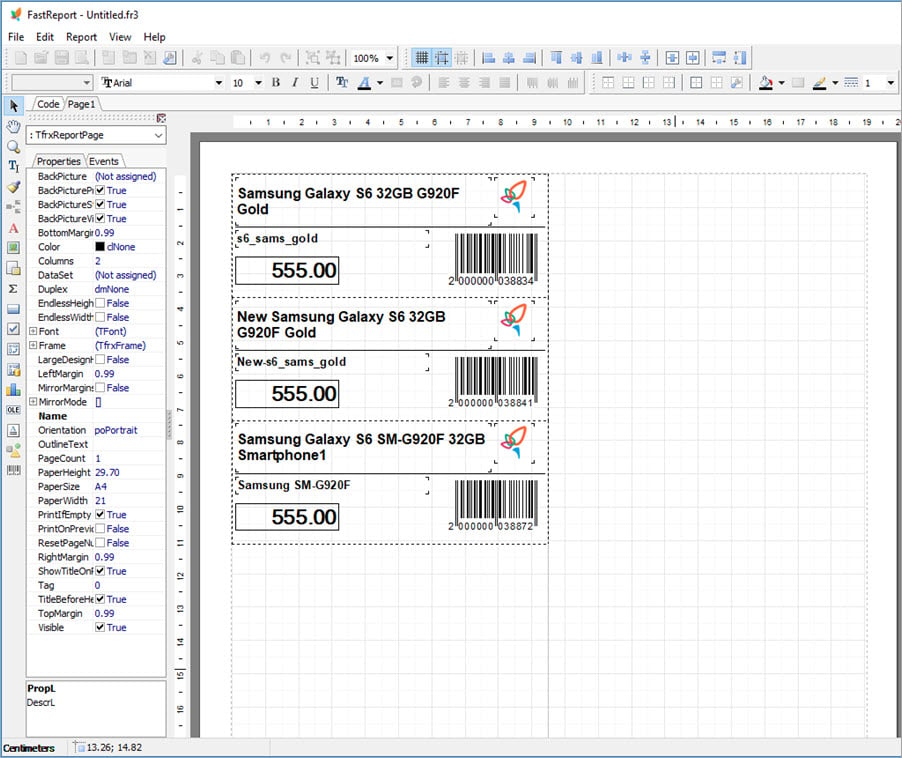
In the opened window you can change the font, background, logo and other elements of design via the external FastReport tool:
How to generate PrestaShop barcode labels for product combinations
You can preview and print barcode labels for product combinations in the same way:
Step 1. Select several products in the grid.
Step 2. Right-click on any of them to call the context menu and click on Reports > Combinations Barcode Labels (UPC) or Combinations Barcode Labels (EAN13) depending on what you need:
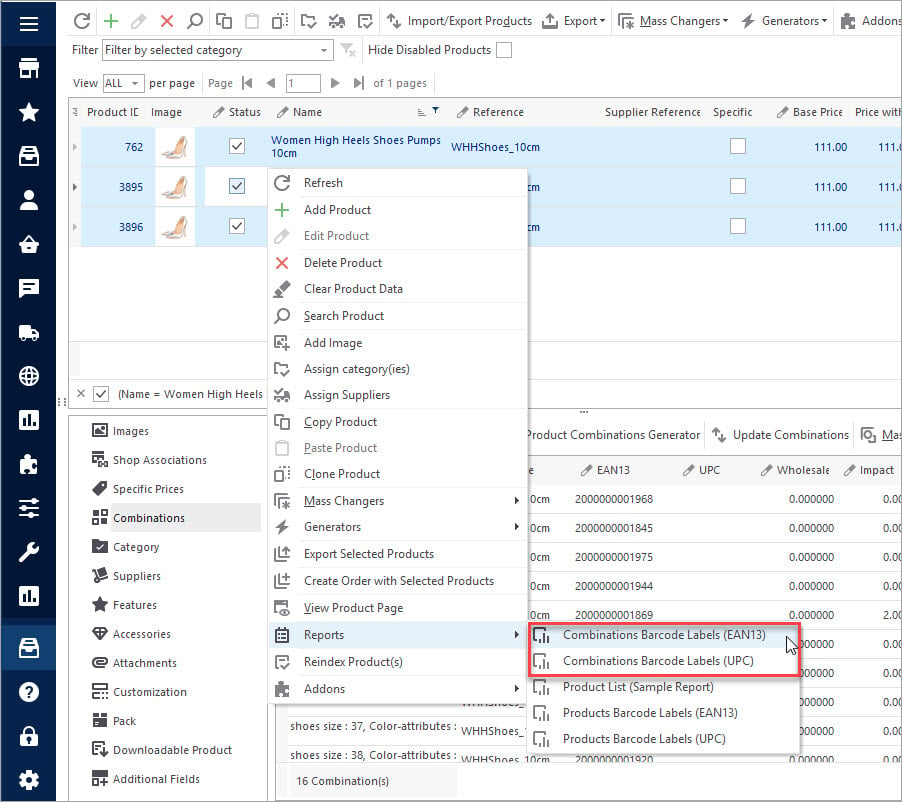
In our example, we selected three products that have 16 combinations each. So on the preview page there will be 16 labels generated:
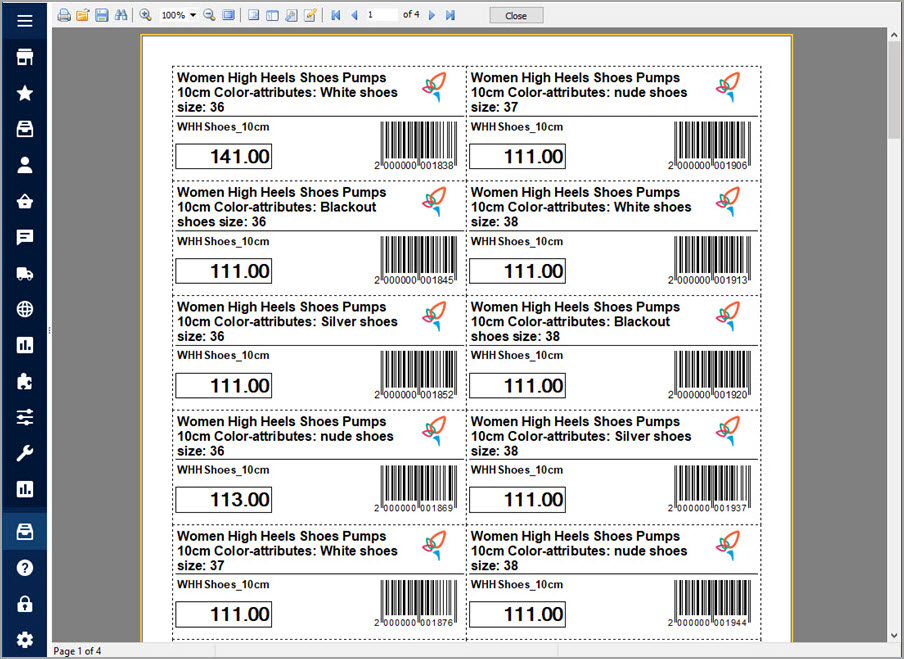
What Information Do Barcode Labels Hold?
- product name;
- reference;
- price;
- barcode.
Generate barcode labels in bulk for all your catalog. Use professionally looking shipping labels with accurate and complete information to make your business more productive. Generate barcode labels in seconds with Store Manager for PrestaShop –
www.prestashopmanager.com/free
Related Articles:
Print PrestaShop Receipts via Till Printer
Check the way to print PrestaShop till receipts in few clicks. Read More…
How to Create Order via One-Page Wizard of POS
Get step-by-step instructions on how to create PrestaShop order, change it’s status, specify delivery and payment method. Read More…
PrestaShop Invoice VS Delivery Slip VS Credit Slip
Learn the purposes and contents of PrestaShop invoices, delivery slips and credit slips. Read More…
Bulk Assign Attachments to Products
Find out how to add downloadable attachments to products massively or individually. Read More…
Hello, Carlos!
Thank you for your question.
Yes, you can generate barcode labels for products with combinations as well. To do so, select the needed product and via the context menu go to Reports / Combinations Barcode Labels (Sample Report) option.
I’m testing prestashop manager, and my question is how can I set product_ID + (reference or attributes) as barcode ?
Hello, Armin!
Thank you for your question.
As you might know, product barcode can only consist of figures (see the screenshot). If this requirement is ok in your case, e.i. the generated barcodes based on product ID + reference / attributes will consist only of figures, we can help you out with our Advanced Report development service.
i use the Prestashop store manager and want to print lables with barcodes. I can save a template so that it always shows me the labels. without having to edit them every time? for example, does it always show me your logo instead of mine? Can I adjust this anywhere?
Hello, Duja! Thank you for your question.
To generate the document with Barcode Labels (those you see on the preview with the sample logo) Store Manager uses an external FastReport tool. This tool is integrated in the Store Manager.
So to change the design of the Barcode Label you should edit the file which is stored on your computer along with other program files.
(As changing the original file can cause an error with the generating of the barcode labels if anything is done incorrectly, we advise you to make a backup of this file – just copy it and save elsewhere on your computer).
Now, here is how to edit the file (you can also see the screencast https://www.screencast.com/t/kX1AUv6y).
- Paste the path into the command line: C:\Users\%USERNAME%\AppData\Local\eMagicOne Store Manager for PrestaShop\Custom_Reports\Barcode_Labels
- Open the folder with the appropriate code (EAN or UPC). Open the file with the .fr3 extension (double-click on it).
- The FastReport editor will open. You will see a sample label. Right click on the eMagicOne logo and delete it. On the left panel, click the Add image icon, upload your logo and press the check mark to save it.
- On the upper tools panel press Save. Close the document.
Important! New logo file should be in .jpg or .png format and should be 256 x 256 pixel size.
Return to the product grid. Select products with EAN/UPC codes > right-click to open the context menu > select Reports->Product barcode Labels (EAN13/UPC). Now the Barcode Label has your logo.
In case you get an error, replace the file with the backed up file. Please contact our support manager if you need any assistance.


How about combinaciones? Can i make labels for them with PrestaShop Manager?