Shoppers who are trying to make a purchase online usually rely upon PrestaShop images when deciding to place the order or not. As there is no other way to evaluate or check out the product, pictures are perfect “promoters” of goods at your PrestaShop store.
Adding images you should consider the easier and most undemanding way of performing the process. There exist one. PrestaShop images are added flawlessly simply by dragging and dropping within Store Manager for PrestaShop.
In order to add an image to a product using this application, select the item and check the Images tab in the lower grid.
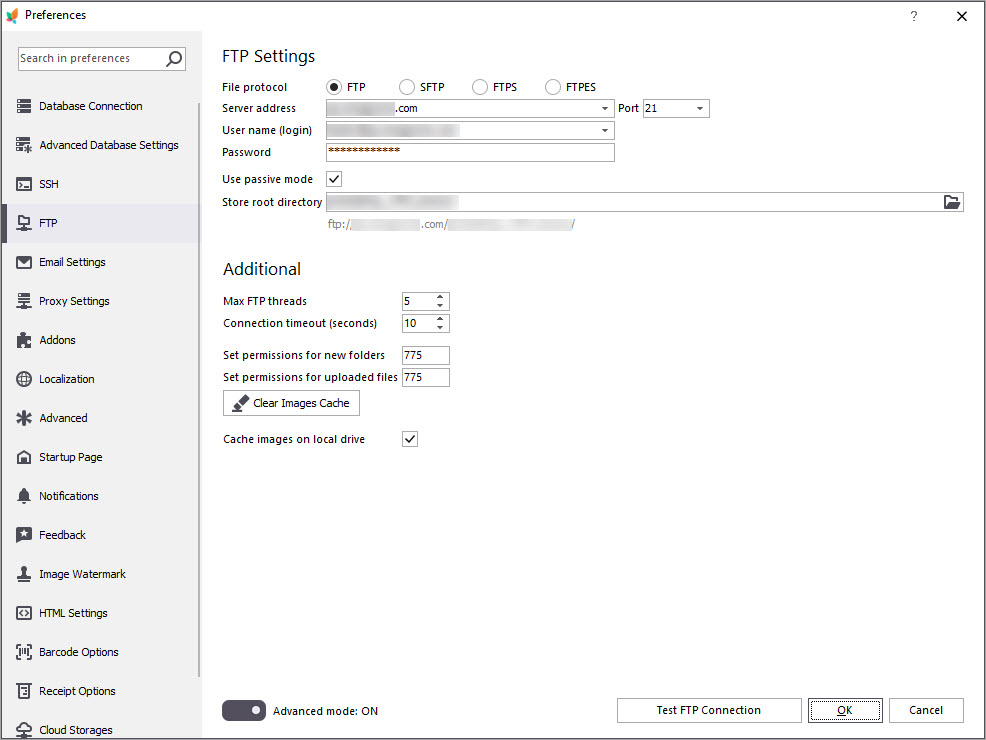
In case all the options are grayed out and there are no images that have already been uploaded previously, then it means that you haven’t set up an FTP connection and not able to upload or manage images.
To set up an FTP connection, open Preferences (F12) -> FTP and indicate there all the settings.
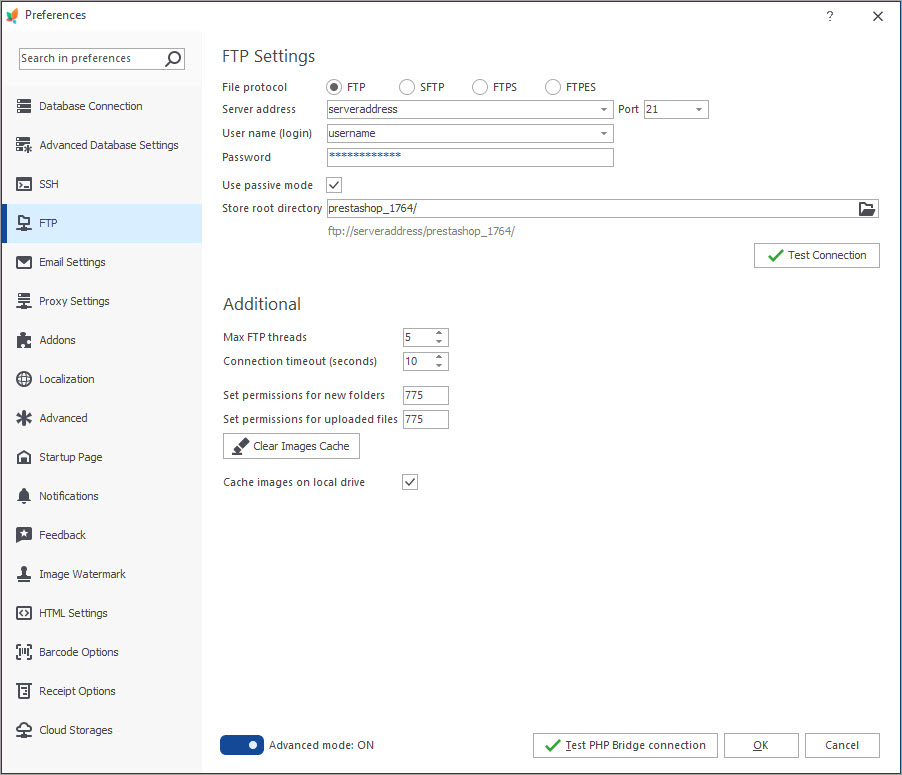
Options to manage your PrestaShop images
After the connection is set up, you can return and manage your images.
The following actions are at your disposal:

- add the image using the corresponding button that allows appending one or a couple of images for the particular product
- replace selected image with another one to be added instead
- edit caption of the image and change picture description
- delete image action enables you to remove selected images. To select a couple of images, press [Ctrl] button selecting the necessary pictures.
- copy the image from one product and paste it to another. Pasting an image to the same product you will duplicate it.
- change the position of images moving them up or down using the corresponding buttons
- make one of the images as a cover. It means that it will be reflected as the main product image at the front-end of your store.
Drag&drop images
Store Manager for PrestaShop is empowered with the useful ability to add images using drag&drop. Basically, all you need to do is to press “Add image” button, browse through the folders of your local computer, click on the necessary image(s) and move them to the place where product images can be previewed.
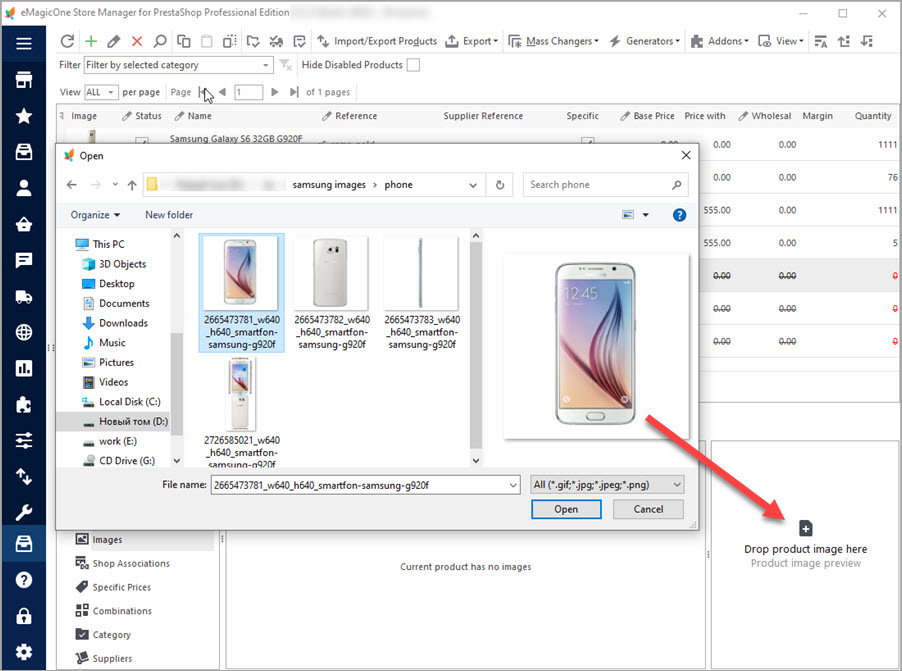
Images from URL
Do you have the links to images? No problem! With Store Manager for PrestaShop, there is no need to download pictures to your PC before the upload. You can click on “Add image” button and instead of selecting one from the folder, simply paste the link to an image.
FTP task queue
All the PrestaShop images you are appending to products at your PrestaShop store is getting to FTP tasks queue. In case you are adding multiple images at once, they require some time to be uploaded, thus, they form a queue and are adding in turns.
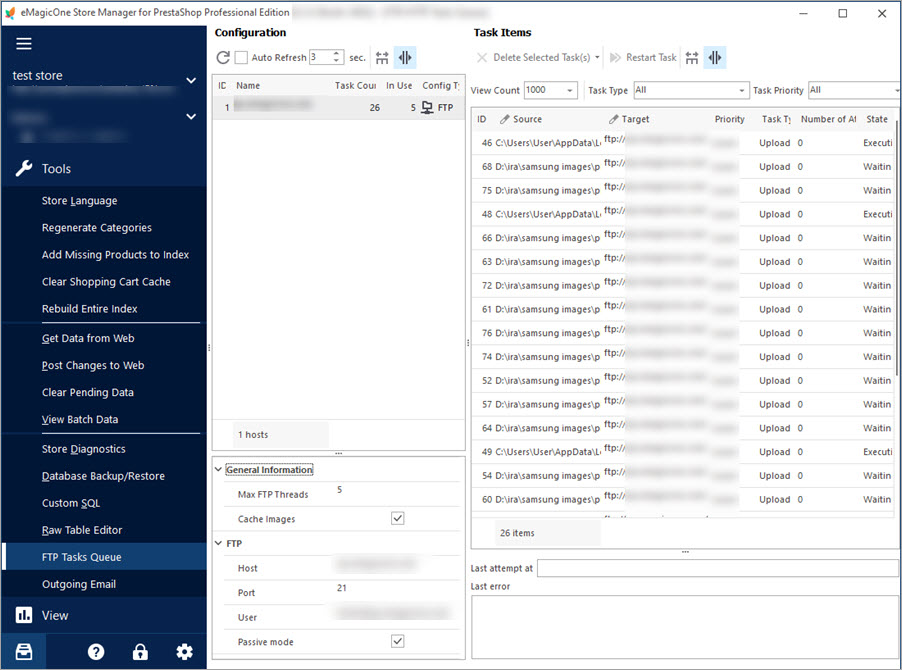
Now that you have a few tips to work with, you’re ready to get as many images as you need. Images attract and with a Store Manager for PrestaShop your store will delight the eye.
Find out how to upload PrestaShop images importing them from the file –
Related Articles:
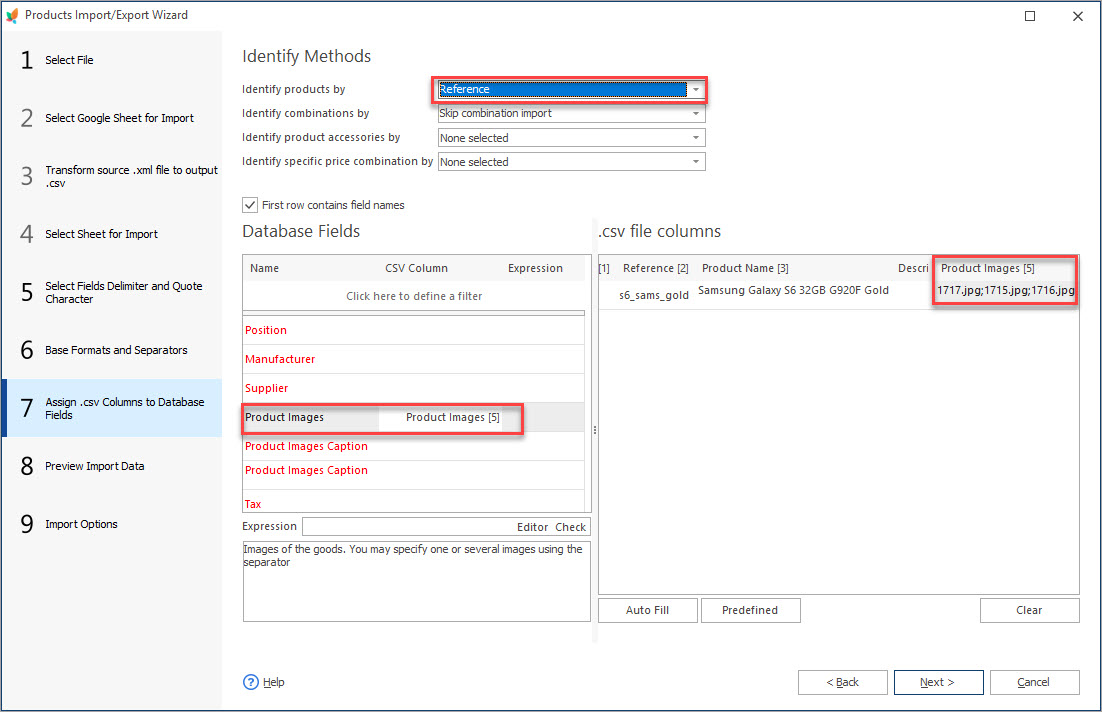
How to Import Multiple Images to PrestaShop Products
Get step-by-step instructions on how to configure import file to upload a few images to one product. Read More…
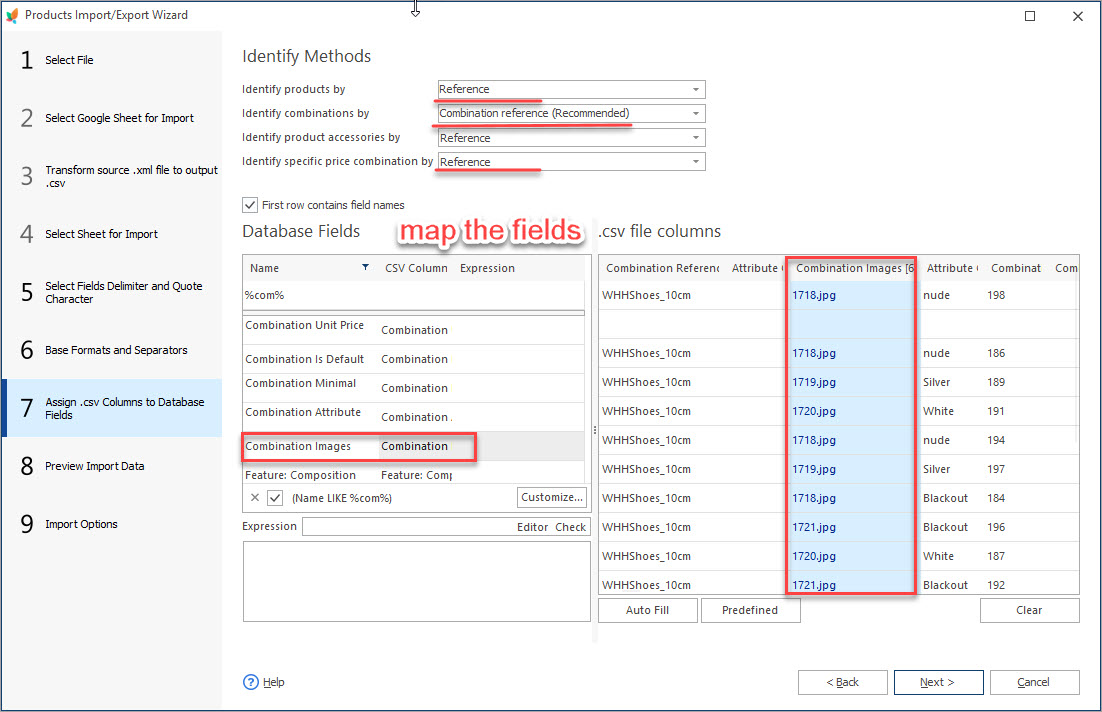
How to Set Different Images to Product Combinations
Find out how to attach different images to product combinations during import or add them manually. Read More…
What to Check if you Cannot Upload Images to PrestaShop
Check the reasons of failure to import images to PrestaShop and discover their solutions. Read More…
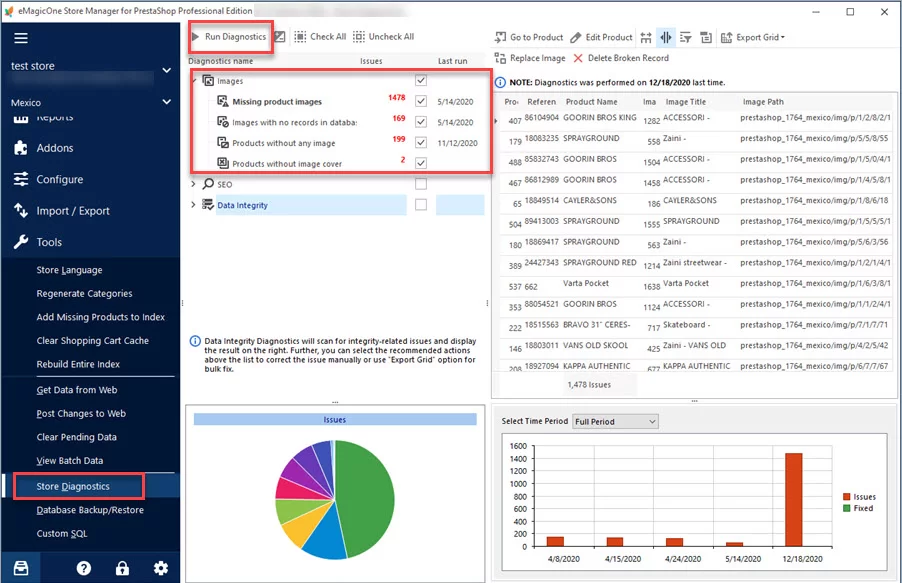
How to Get the List of Products Without Images in PrestaShop
Discover the ways to detect products without images in PrestaShop. Read More…
COMMENTS

