
How to Set Different Images to PrestaShop Product Combinations
If you are bumping against the question: how to display different pictures for combination at the storefront and looking for the quick way to cope with this task, continue on reading this article.
Store Manager for PrestaShop comprises solid functionality for refined combination handling and, as you might have guessed, allows to efficiently configure images for each of variants. Below you can learn how to assign pictures to product variants in quick and flexible ways.
Attach Images to Combinations in the Course of Import
Using Store Manager for online shop handling, you are in the know that combinations can be either created or updated via product import wizard. It depends on the situation. You might have added products previously and now decide to ascribe combinations to it. Possibly, you are uploading new product listings together with variants or simply update products and their combinations. Whatever task you are going to accomplish, you must consider the file, details are stored in, and import settings to successfully add or update merchandise.
[quote color="yellow"]Besides product or combination details in the file, you should, of course, provide images (ones stored locally or, for example, at suppliers’ site). URLs that are accessible in the browser should be provided in the datafeed if you upload remote pictures, for example - https://www.site.com/prestashop/img.jpg[/quote]We provide the example that will illustrate how to arrange the import file when one need to upload combinations with images to already existing product.
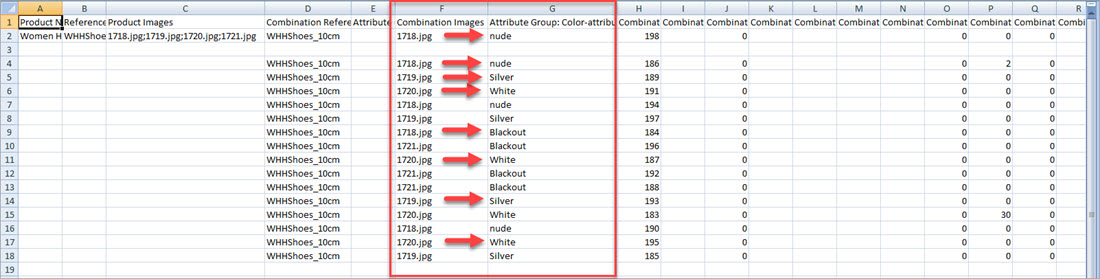
[quote color="yellow"]The file contains product identifier (Reference), attributes (color and size) on the basis of which variations will be created. Each row in the file represents combination (variation). “Combination Image” column, respectively, contains PrestaShop combination images. These images we also place in “Product Image” column, detaching image names by delimiter (in our case semicolon). Additionally we add quantity to each of variants.[/quote]
Configure data import settings afterwards, paying attention to:
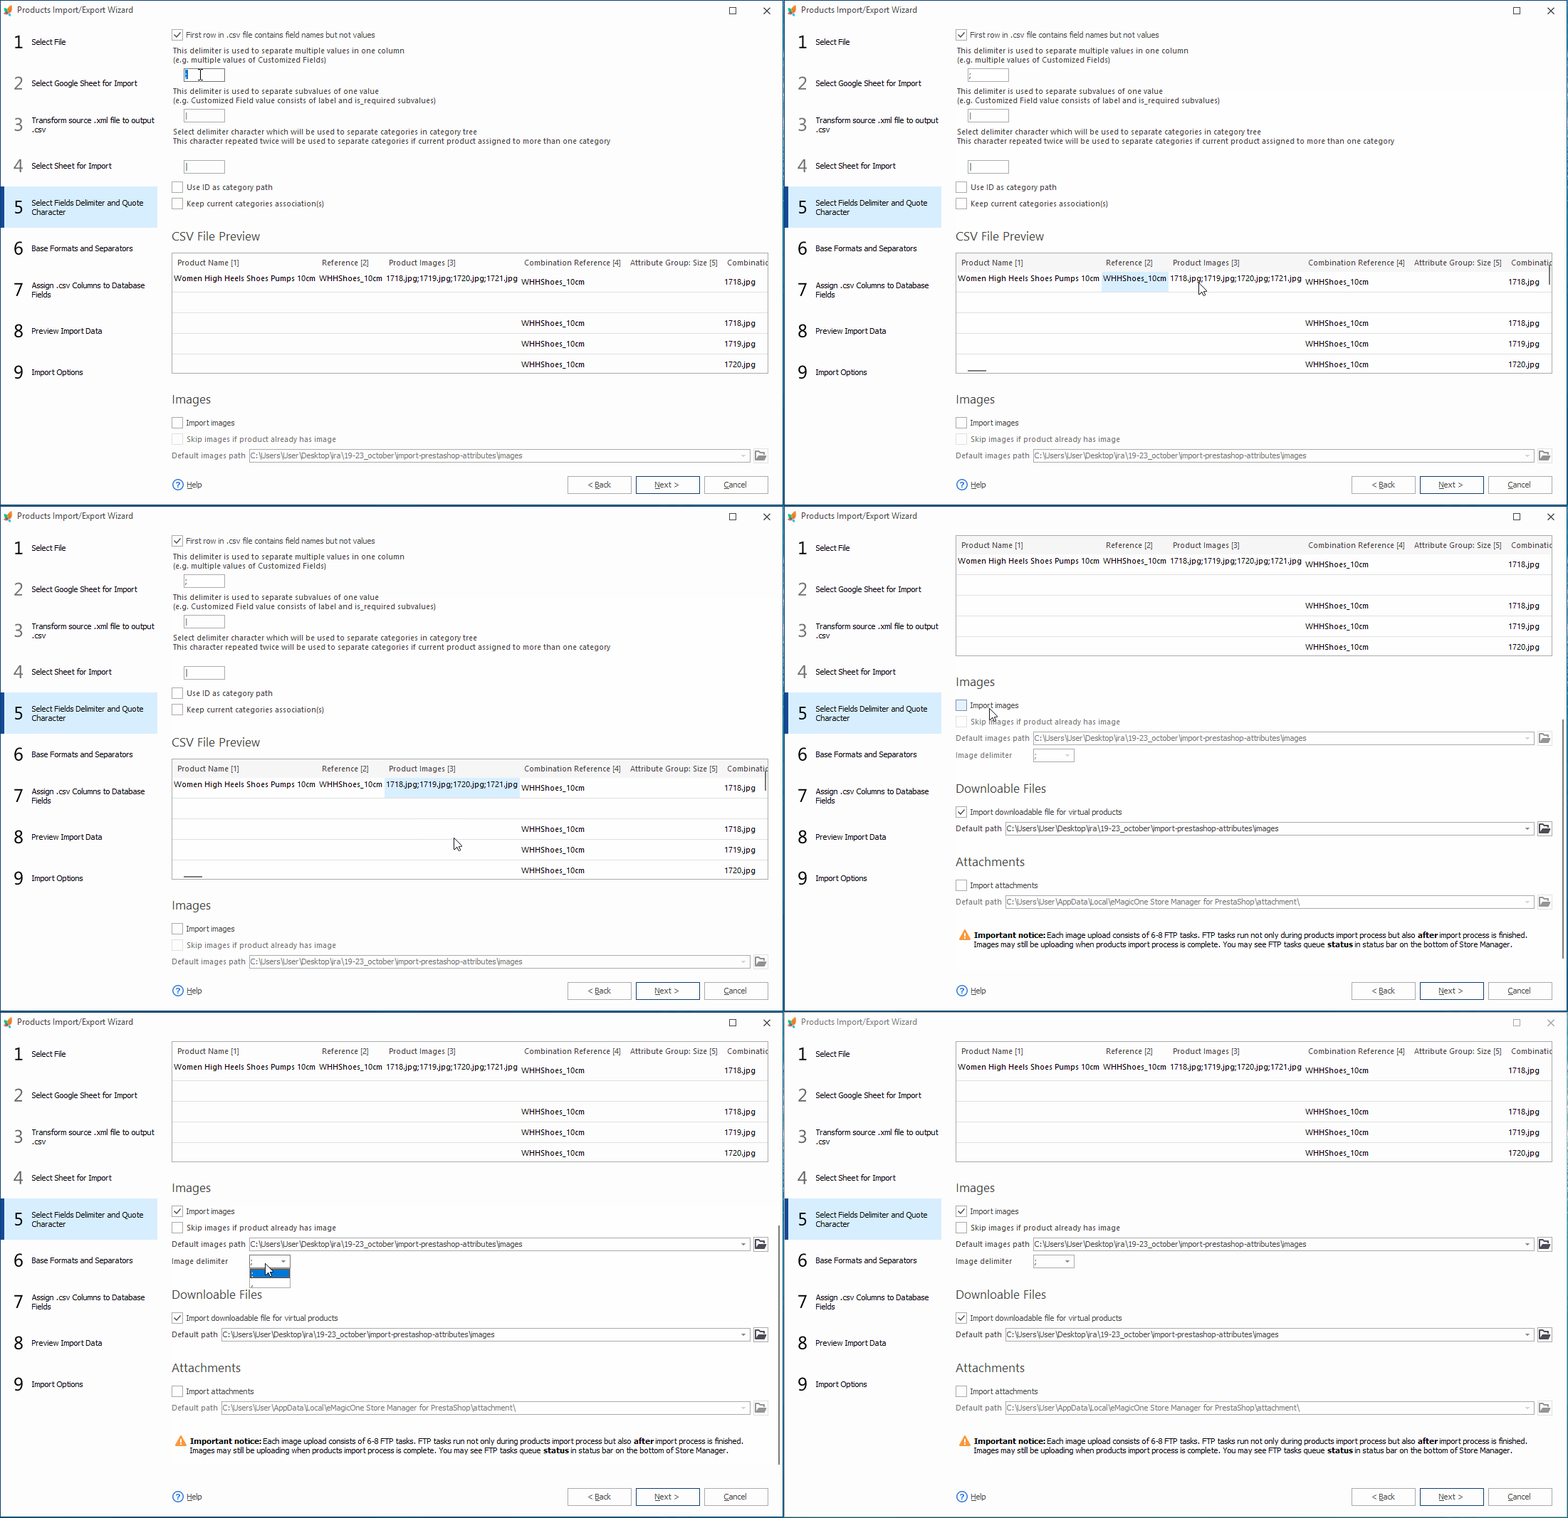
- "Select Field Delimiters and Quote Character" step of the import wizard
- Check “Import Images” box.
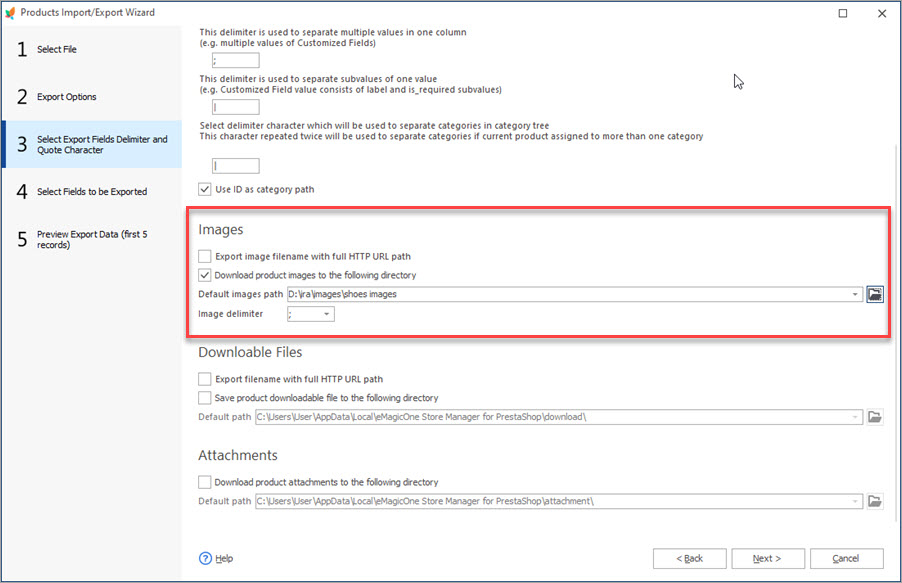
- Select the folder, which stores pictures to be added to the combinations, if you upload local images. If you miss this, images will not be added to combinations.
- Select separator used to detach images within one .csv file column
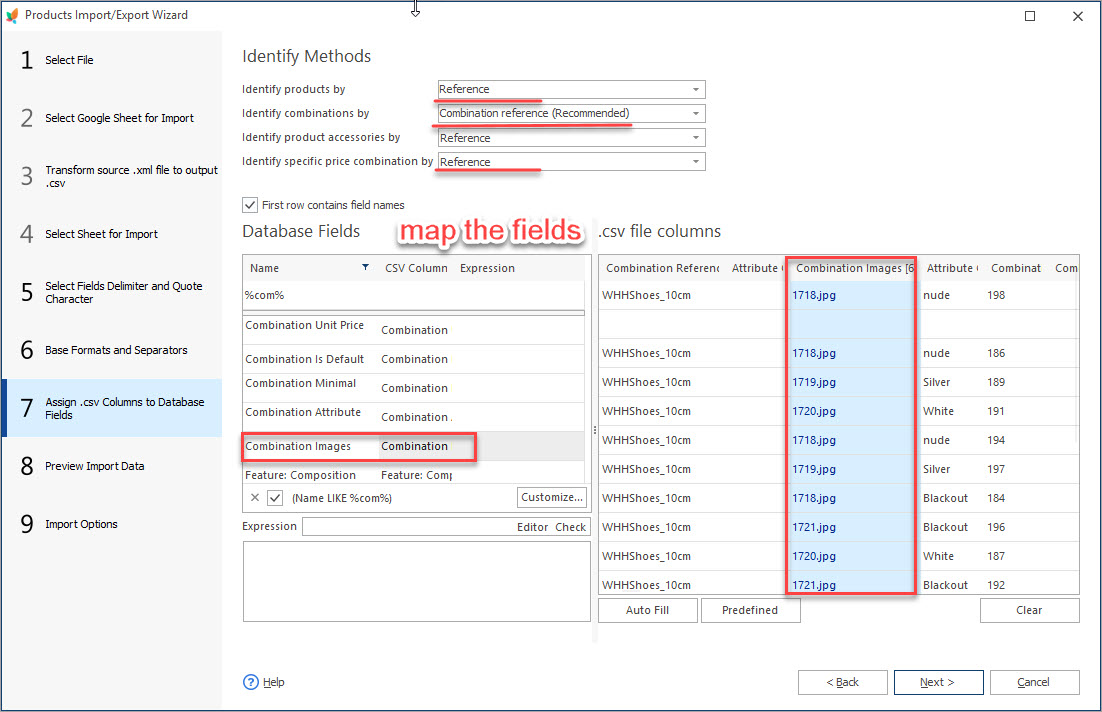
- Field mapping
- Select the product, images should be managed for and go to its combinations
- Select the combination and click on ‘Assign Images’ option on the toolbar
- There appears the window which lists all the photos, inherent to the product. Assign suitable one to selected PrestaShop combination ticking the box for it
- Identically allot images to other variants
Below in this window you will find image import settings.
It is obligatory to specify correct product and combination identifier, ascribe file columns to suitable database fields. We select product reference as identifier, since it is provided in the file to be uploaded. We are going to add variations to the product and, correspondingly, select ‘combination reference’ as identifier.
[quote color="yellow"]Please, note: Combination ID is used for renewing. If you have combinations assigned and want to update, for example, its quantity then you may use ID. If you select ‘Skip combination import’ option, combination info, provided in the file, will be ignored and no variables will be added to merchandise.[/quote]
It is advised to carefully inspect data to be appended to PrestaShop before confirming the process.
Take into account, if you are creating new products with combinations, you should include more details in the import file to make merchandise complete.
Adding Images to PrestaShop Combinations Manually
Store Manager for PrestaShop lets you assign images to products manually via respective “Add image” option, drag-and-drop multiple pictures or take them directly from the browser. Although, images will not be automatically assigned to this or that combination but to the main record.
You need to designate combination-image associations, in the other words, put the image in its place.
The following should be done
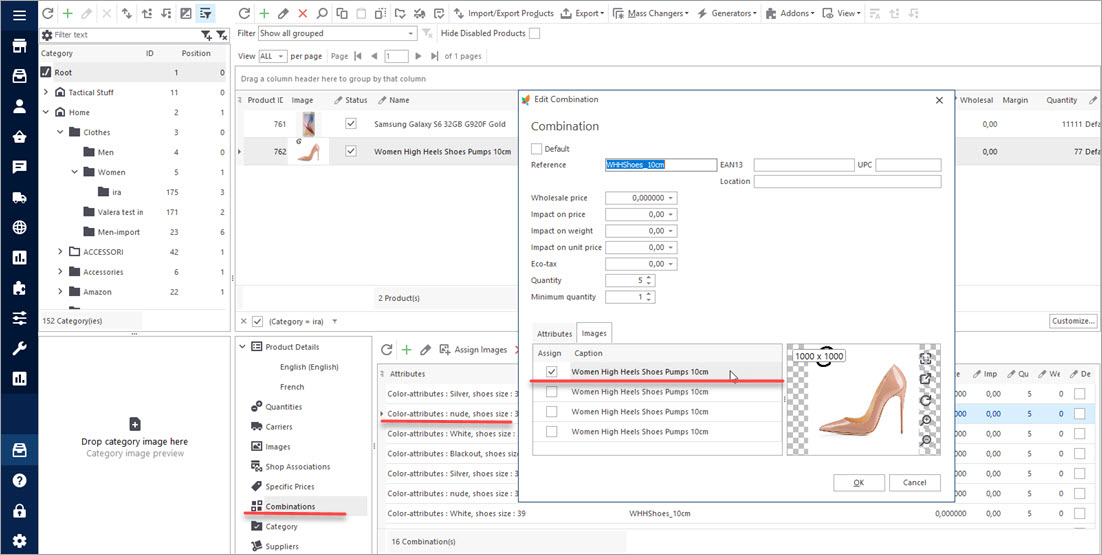
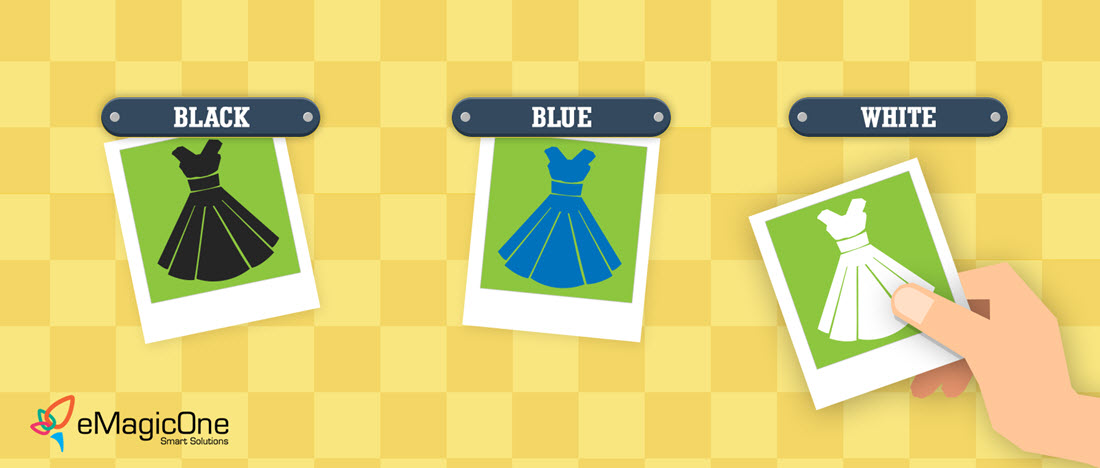
Ready! Now when you select this or that dress color at the storefront, image will change and illustrate what the product looks like. Create attractive and customer oriented site imagery with Store Manager application.
Related article describes all the benefits of PrestaShop attribute textures - www.prestashopmanager.com/useful-articles/tips-tricks/tips-on-how-to-import-prestashop-attributes/
Set different images to PrestaShop product combinations FREE Import Now
Related Articles:
How to Set Different Images to Product Combinations
Find out how to attach different images to product combinations during import or add them manually. Read More...
Update PrestaShop Combinations Preserving Image Relations?
Check detailed instructions on how to update PrestaShop combinations without any troubles with images. Read More...
How to Get the List of Products Without Images in PrestaShop
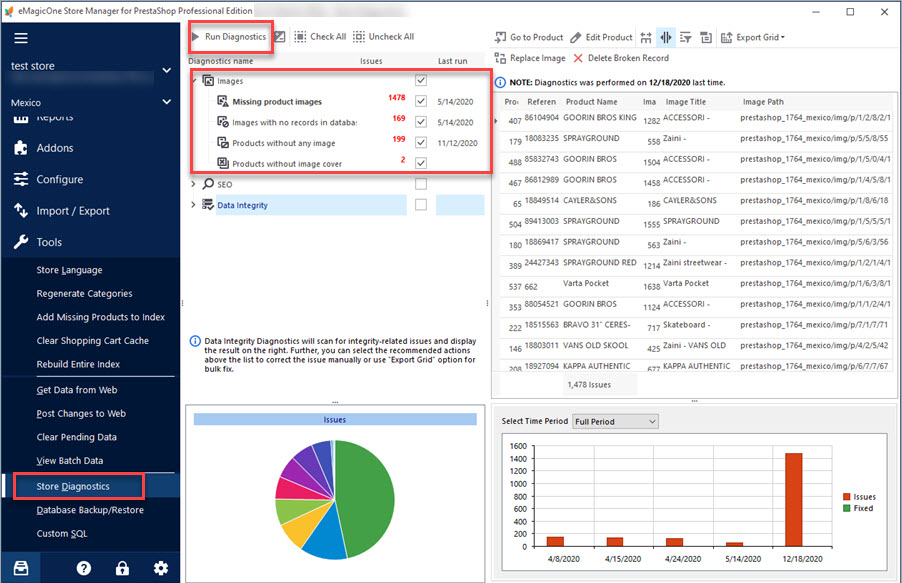
Discover the ways to detect products without images in PrestaShop. Read More...
Keep Your PrestaShop Images under Control with Store Diagnostics
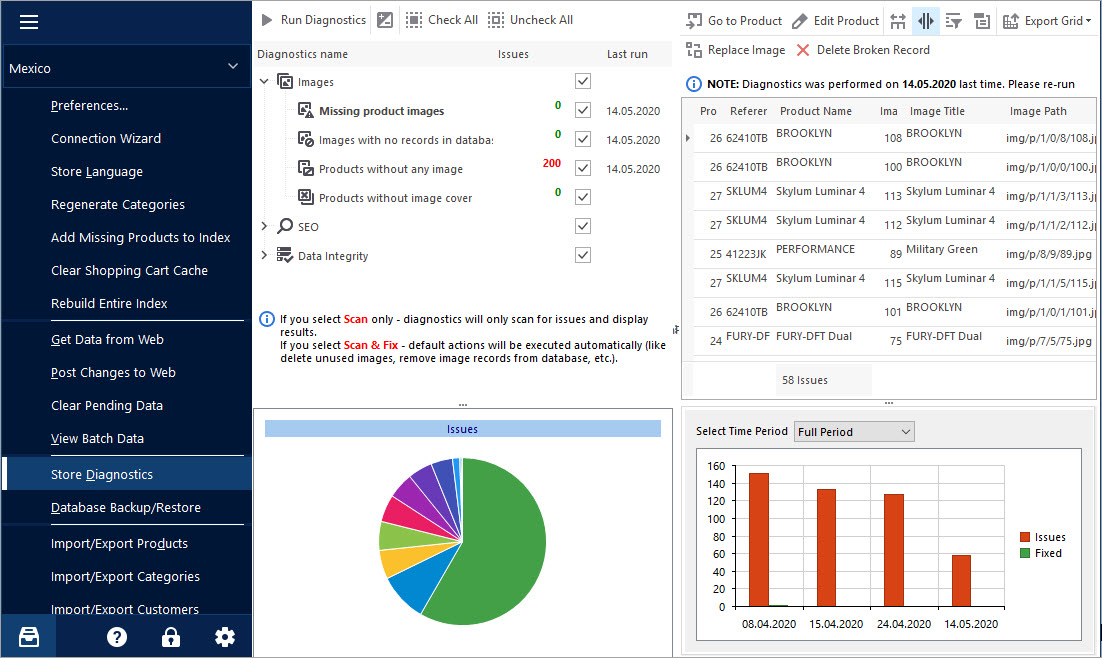
Check the ways to handle and prevent issues with missing product images and images not assigned to any product. Read More...
COMMENTS