Managing an eCommerce store efficiently means leveraging automation tools to simplify product creation. With ChatGPT Vision integrated into Store Manager for PrestaShop, you can generate product listings based solely on images, utilizing any cloud storage that syncs images with your PC, such as Google Drive or Dropbox, etc. Follow this step-by-step guide to streamline the process and if you do not have the software yet, it is a perfect time to get a free trial now. Let’s get started!
Step 1: Open “Create with Vision” Wizard
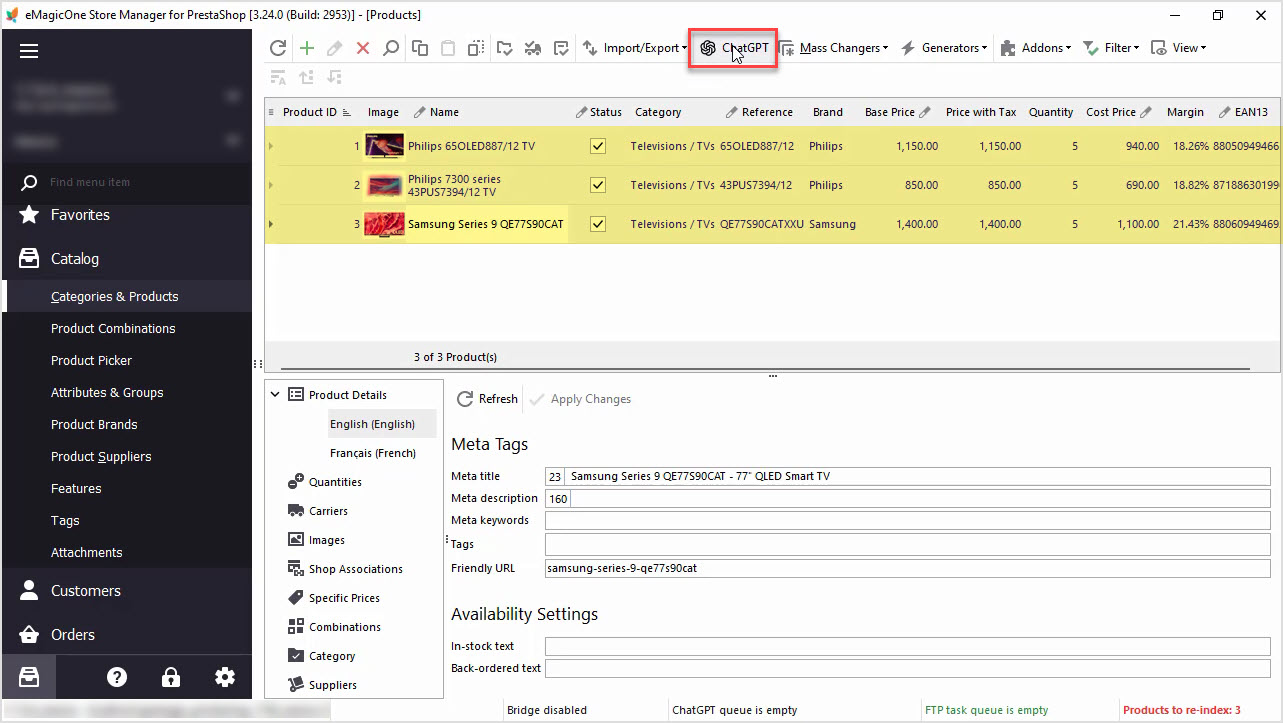
The first step in generating a product from an image is to access the “Create with Vision” Wizard: navigate to the “ChatGPT” menu and select Create with Vision.
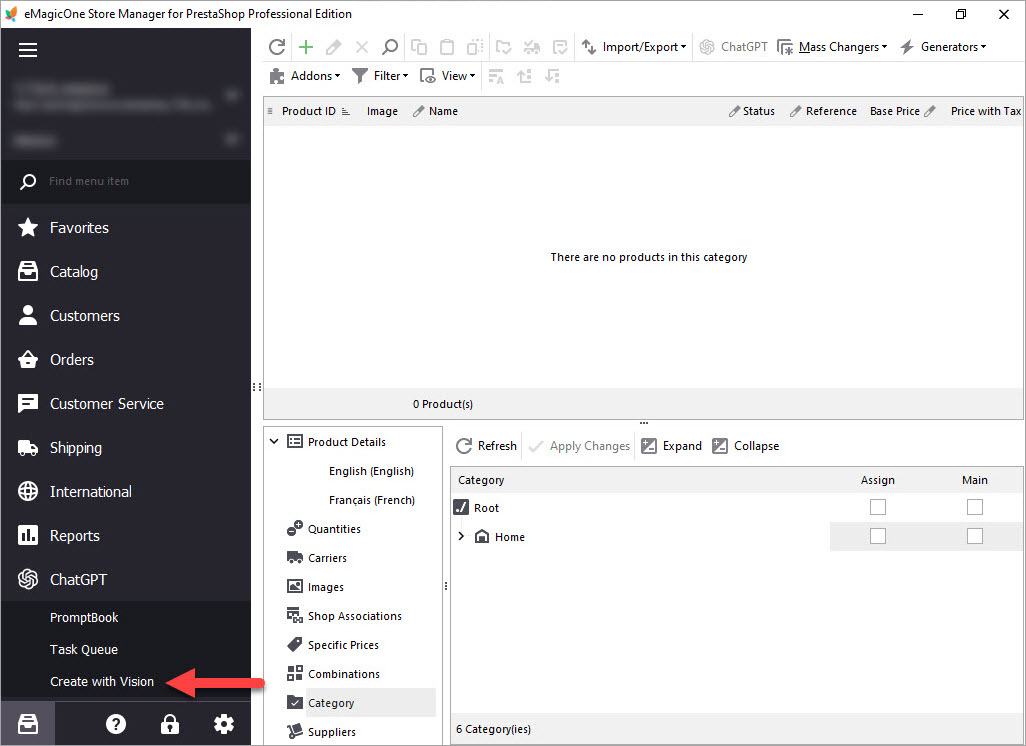
This will open the AI-powered tool that helps generate product data from images.
Step 2: Select the Images Folder
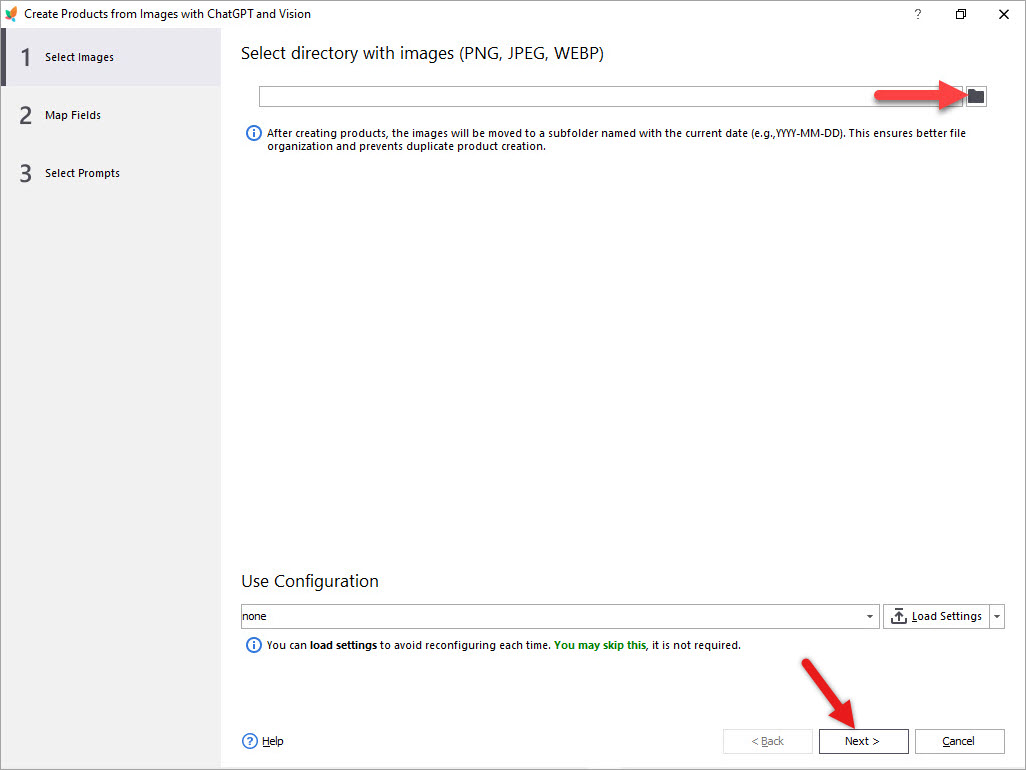
Once inside the Wizard, you need to provide the images:
- Click on Select Folder, navigate to the location where your product images are stored on your local PC and choose the appropriate folder for the new products.
- Hit “Next”.
Step 3: Specify Product Values Before Data Generation
On the next step, specify the values you would like to set for the automatically created product, before its data is generated with ChatGPT and Vision. This will create a temporary product with the values you specify here. Before allowing AI to generate product details, set default quantity, default price, and other fields.
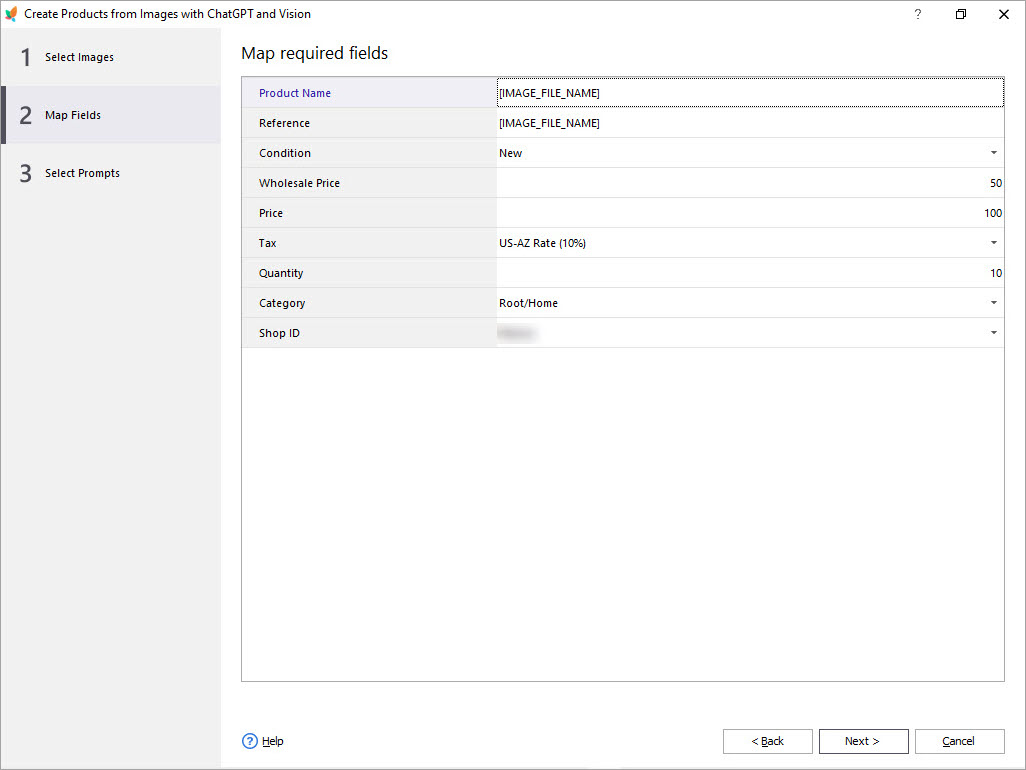
Also, ensure that you select the category in which you would like these products to appear before they are published. Remember this category, as you will need to locate the newly created products within it once product data generation is complete.
Setting these values helps structure your product listing accurately before AI fills in descriptions and specifications.
Once you are done here, press “Next” to proceed.
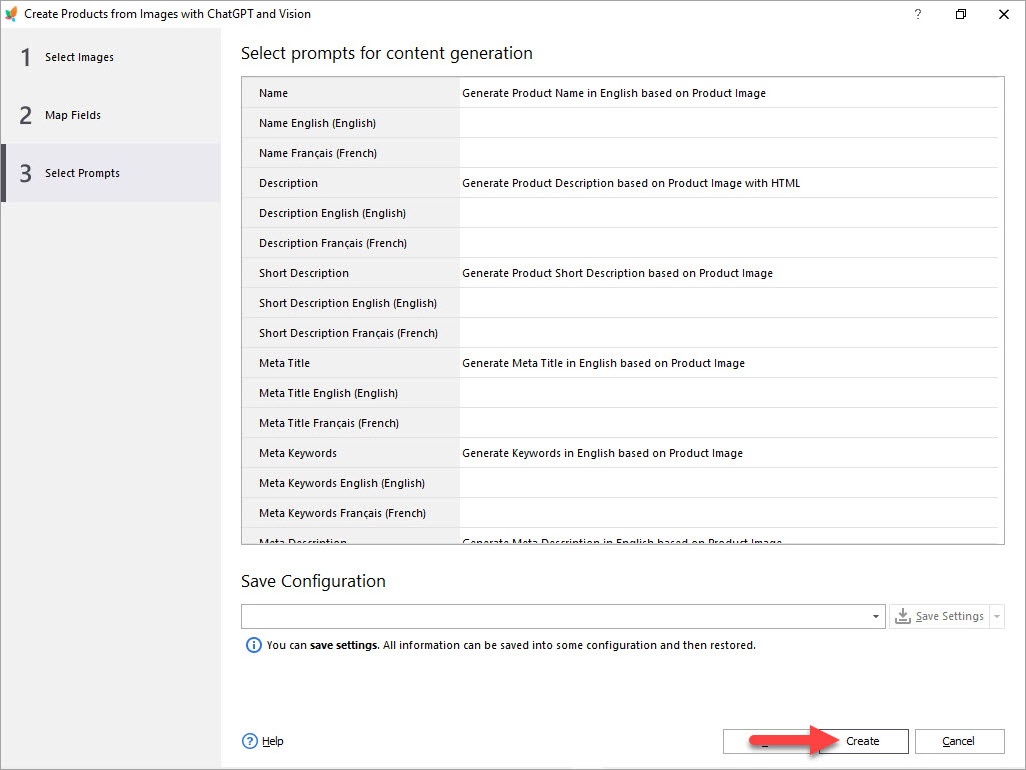
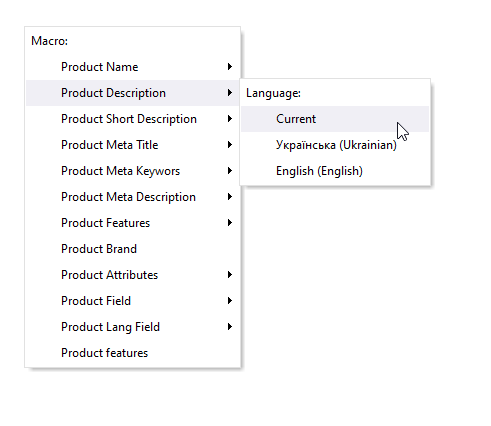
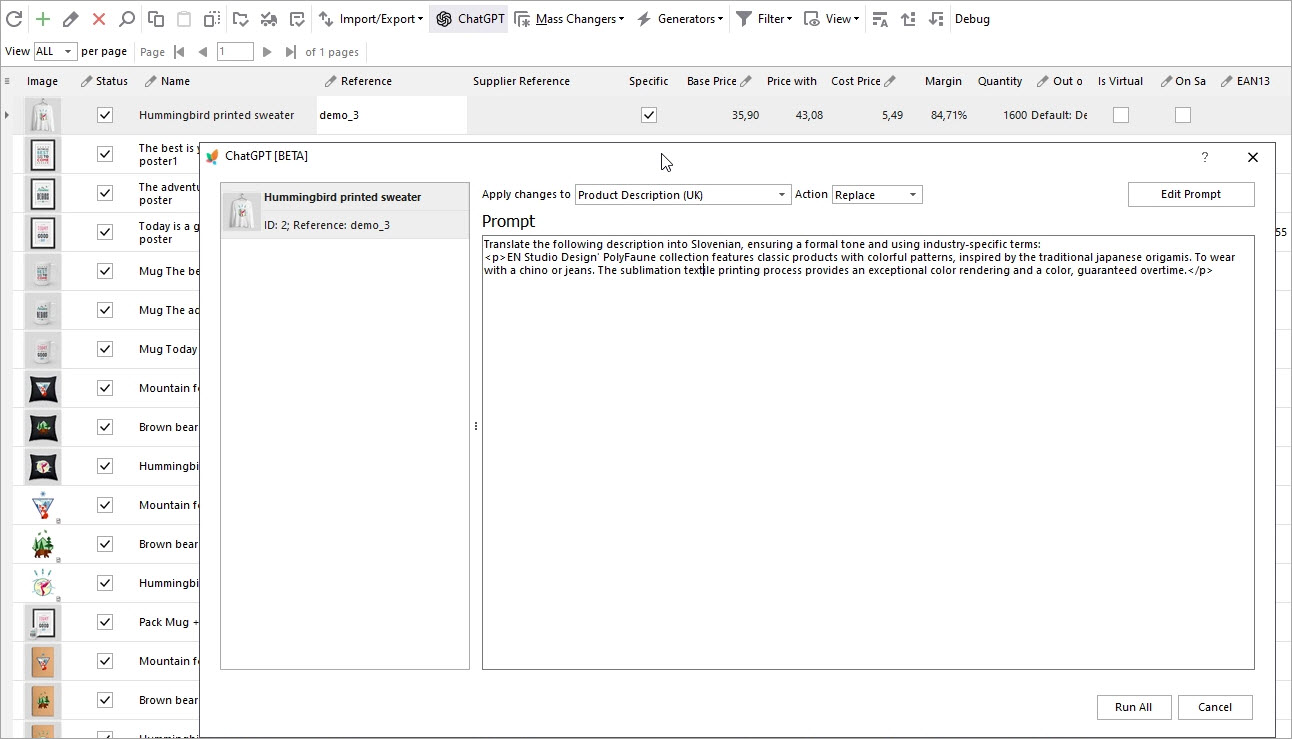
Step 4: Select and Test Prompts
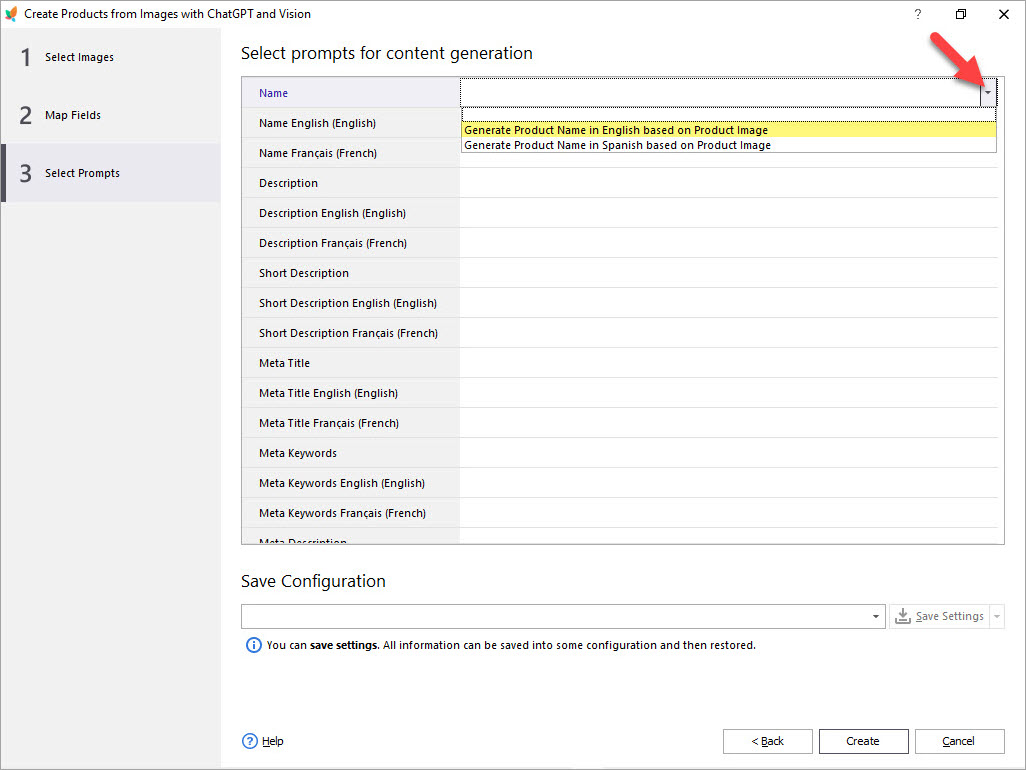
Prompts guide ChatGPT Vision in generating product descriptions. To get the best results:
- Select pre-existing prompts tailored to your store’s tone and style.
- Run test prompts to verify the quality of the generated content.
- If necessary, tweak the wording of the prompts to improve accuracy.
If you would like to add a new prompt, change an existing one, or update it, you need to exit this form and go to the “ChatGPT” —> “PromptBook” menu.
Testing ensures that product descriptions align with your brand identity and provide useful details for customers.
If all prompts are available, you can proceed to data generation. Hit “Create,” and the tasks for data generation will be added to the ChatGPT Queue.
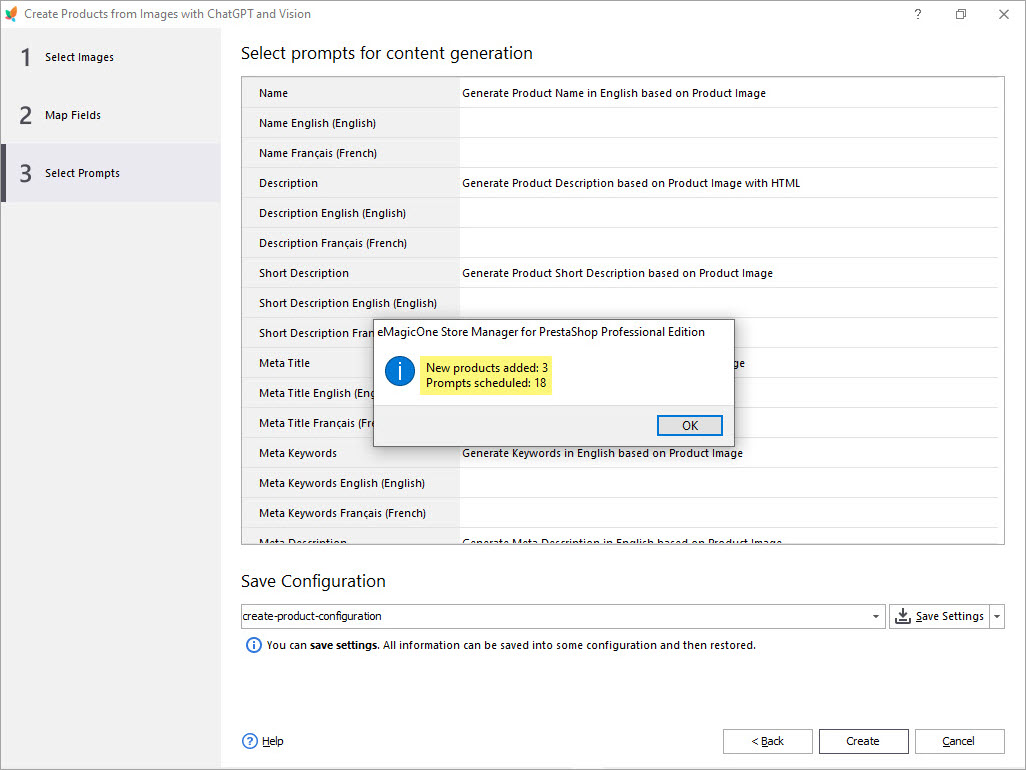
You can save these settings to load them later if needed using the “Save Configuration” option.
On the confirmation form, you will see the number of products that were created and the number of ChatGPT tasks that were queued (one task per field).
The speed of AI content creation depends on your ChatGPT plan and its settings. Take your time, make sure that all tasks are completed before you proceed.
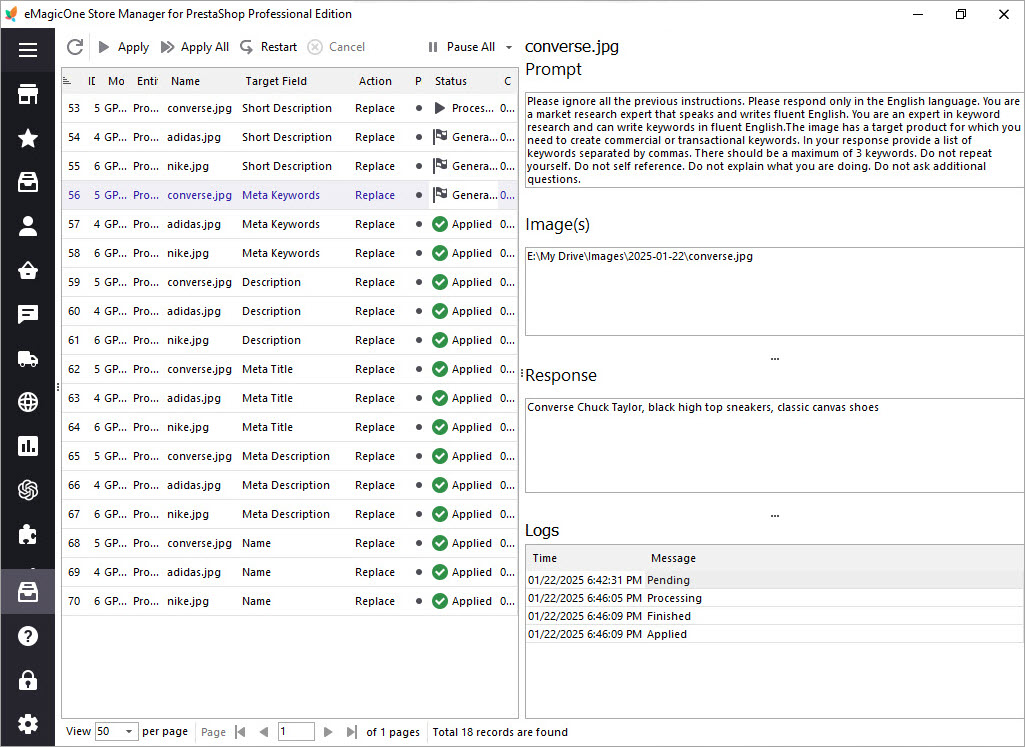
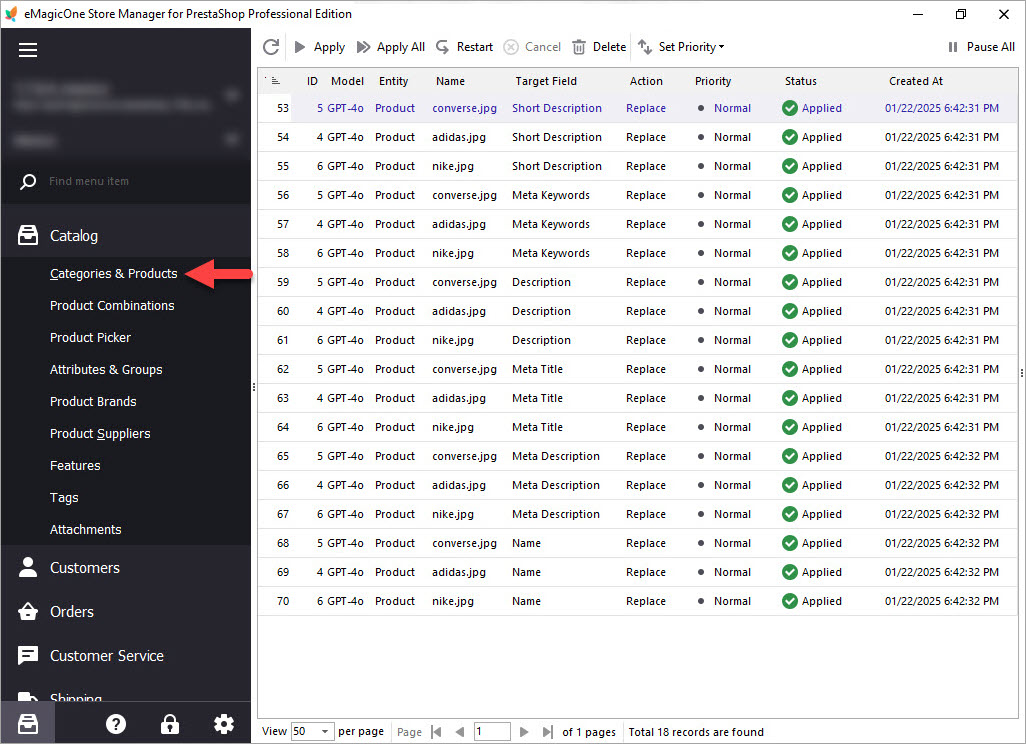
Step 5: Check the Task Queue and Apply Data
Before applying content generated by ChatGPT Vision to your PrestaShop products:
- Navigate to the “Task Queue” to monitor ongoing product creation processes.
- In the “Status” column, review product descriptions, titles, and specifications. All completed tasks have the “Generated” status. Check all generated data before applying it. In case of any errors, provide us with details so we can check them for you.
- If satisfied, hit “Apply All” to finalize the product data.
Here, you will see all generated, applied, and pending tasks. Make sure that all tasks are completed and that data is generated.
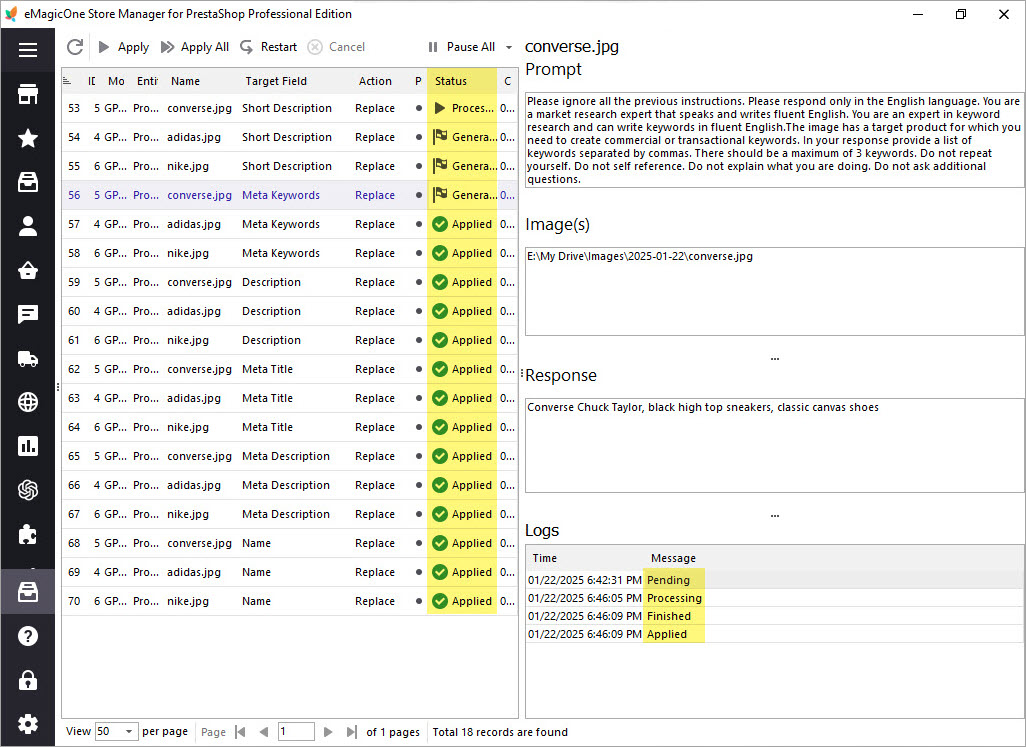
This step allows you to ensure quality control before updating your store’s catalog. This step allows you to ensure quality control before updating your store’s catalog. If, for any reason, you would like to stop the generation, hit “Pause All.”
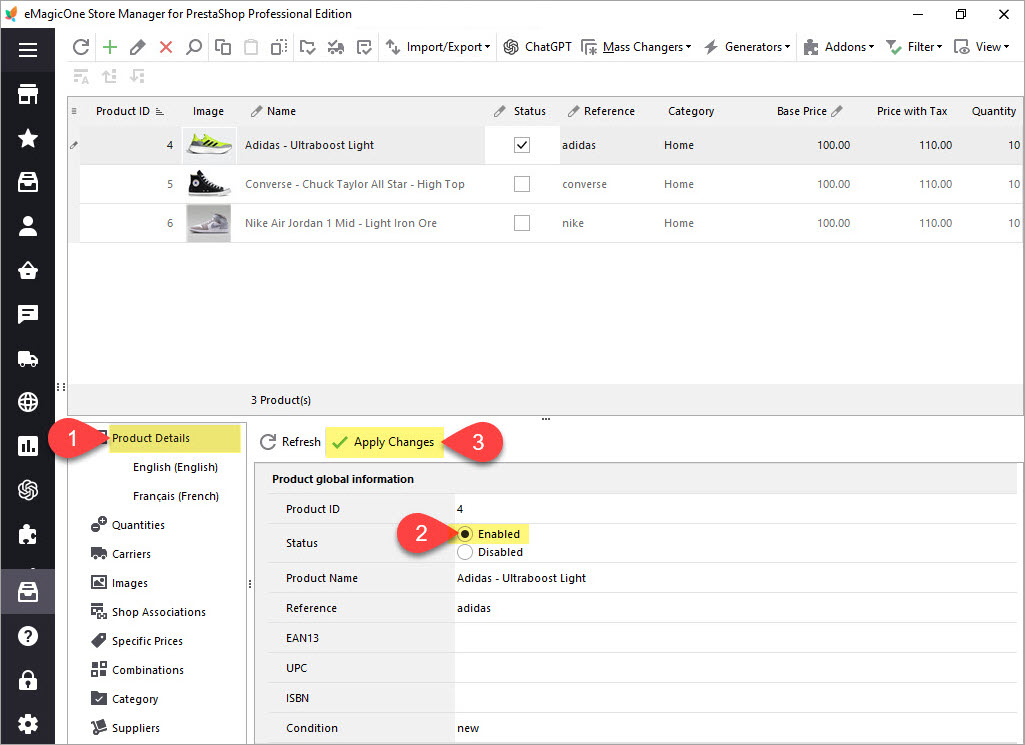
Step 6: Verify Each Product Manually
Find all newly created PrestaShop products with applied data generated by ChatGPT Vision in the “Categories & Products” section under the “Catalog” menu.
Even though ChatGPT Vision is highly capable, AI-generated content may contain errors. To prevent inaccuracies, go through each newly created product one by one, checking descriptions, pricing, and specifications for correctness, and make manual adjustments where necessary. By carefully reviewing the generated content, you maintain high-quality product listings and a professional online store. Once you are done, make the product visible in the PrestaShop frontend by clicking on: Product Details – Status – Enabled in the lower grid.
Leveraging ChatGPT Vision in PrestaShop Store Manager dramatically speeds up product creation. By following this step-by-step process, you ensure accurate and engaging product listings while maintaining control over your store’s content. Regularly testing prompts and reviewing AI-generated data will help optimize the quality of your product descriptions, making your eCommerce store more efficient and user-friendly.
Create a PrestaShop Product Using Only an Image with ChatGPT Vision by eMagicOne
Download FREE trial
Related Articles:
How to Generate Product Short Description Based on Product Name and Product Brand
Leran how to generate product short descriptions based on product name and any other field in bulk with ChatGPT for PrestaShop. Read More…
Translate Product data with ChatGPT Plugin
Are you looking to expand your market reach by translating your PrestaShop product descriptions into multiple languages? Look no further – the ChatGPT makes this process a breeze. Read More…
How to Write a Perfect ChatGPT Prompt for PrestaShop Products, 8 Things You Should Include or Check
Find tips and tricks on how to write a perfect prompt for your specific case to maximize the potential of AI tools for your business. Read More…

How to Proofread, Make a Spell Check for PrestaShop Product Data Massively with ChatGPT
In this article we’ll show you how to perform a spell check or proofreading of PrestaShop product description with Chat GPT and Store Manager software. Read More…
COMMENTS

