PrestaShop CMS pages are the pages where you can keep some content like text or images.
By default, in PrestaShop there is only one CMS category, which is the Home page. Though, it is possible to add multiple CMS subcategories and pages.
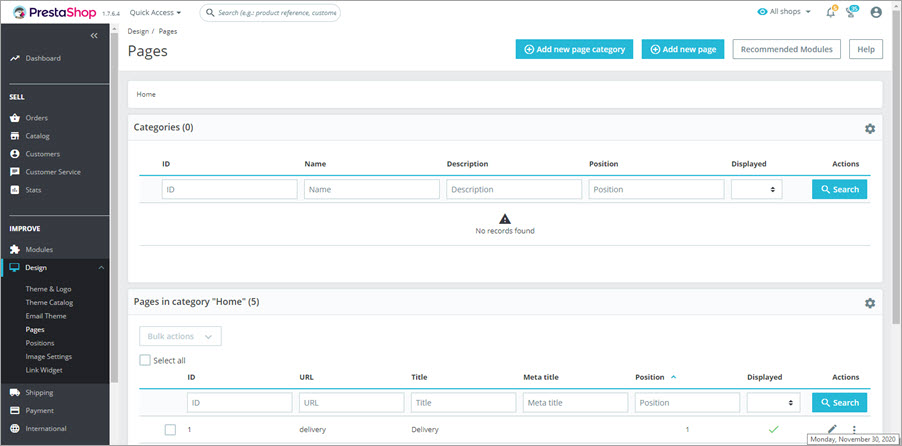
How to Create PrestaShop CMS Page?- From admin panel go to ‘Design’=> ‘Pages’. If you scroll down, you can find the CMS pages contained in the ‘Home’ category.
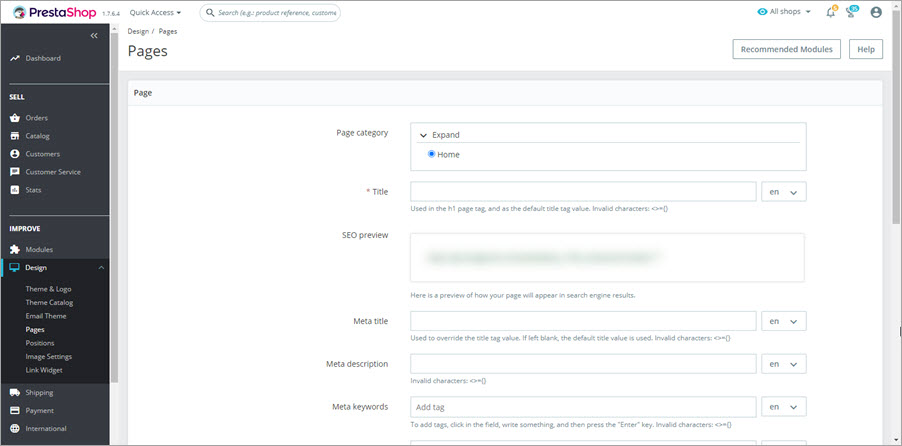
- Press ‘Add new’ to add a new page and fill out the form.
- Enable indexing by search engines and visibility on the storefront if necessary.
- Tick the shops where you want the created CMS page to be present.


Store Manager for PrestaShop allows to easily add, edit and remove CMS categories and pages.
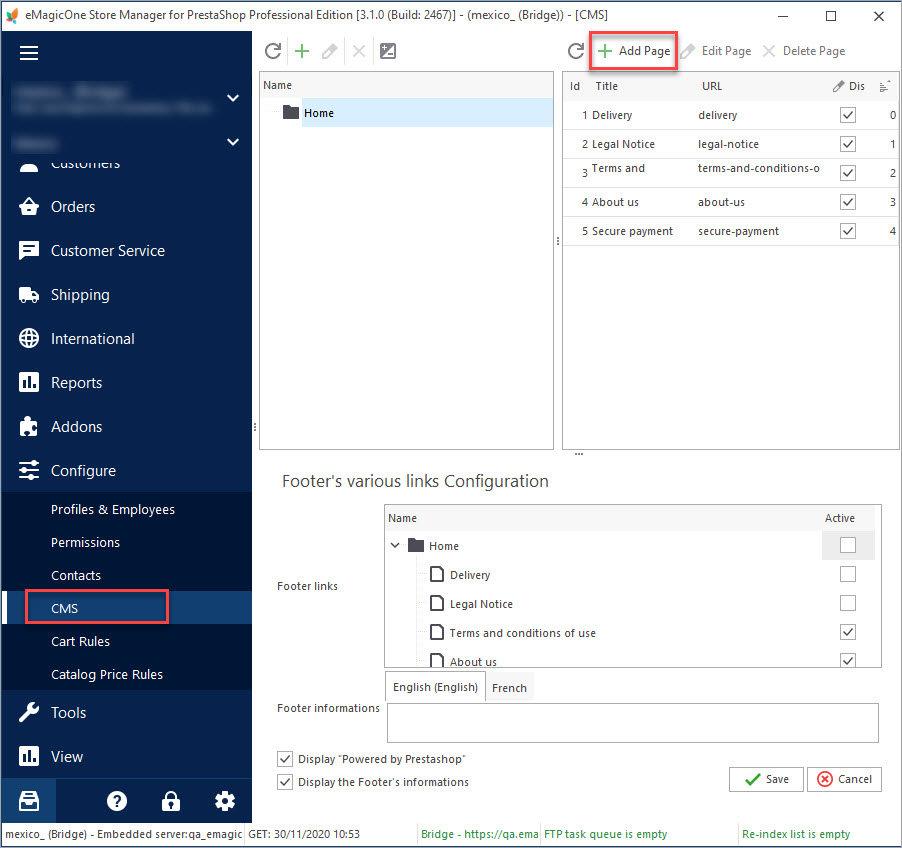
- Open the ‘Configuration’ tab and go to CMS section. Here you can find the full list of CMS pages comprised in your PrestaShop.
- In order to add new CMS page, press ‘Add page’ button and fill out the form.
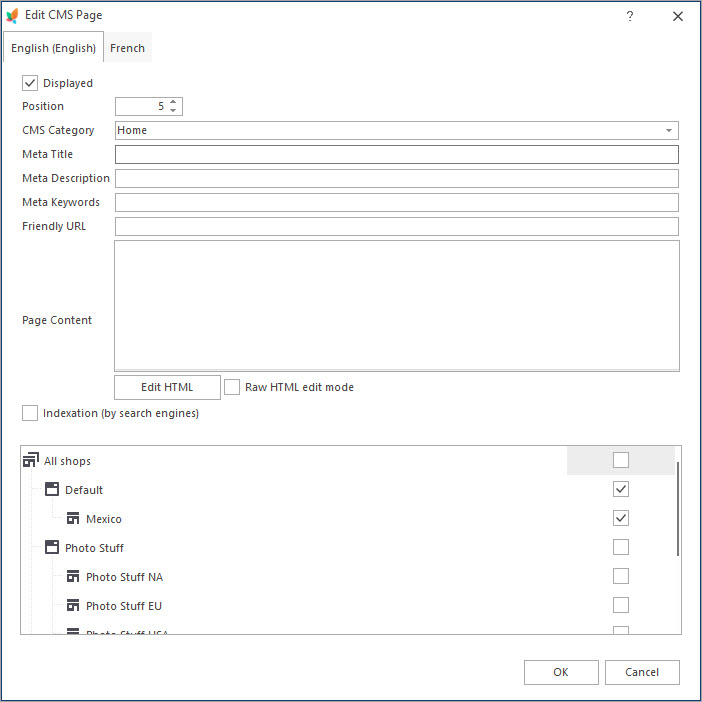
- Check the ‘Displayed’ box if you want the page to be visible for public.
- Select the CMS category and specify meta title, meta description, meta keywords and friendly URL.
- Write the text you want to be displayed on the page. You can enable the raw HTML edit mode to design the page layout appropriately.
- Configure the shop association and press ‘OK’ to save new CMS page.


You can allow the page to be indexed by web crawlers by checking the ‘Indexation’ box.
Manage PrestaShop CMS for 14 days free – Free Download
COMMENTS
Be the first to comment.

