Managing a PrestaShop store is a time-consuming procedure when it comes to operating a shop with a big number of goods. Adding a product warehouse location eases this process in a good number of hours. Having the possibility to create such kind of data feeds would greatly help merchants to easily find the exact product storage, depending on the parts his/her warehouse is divided into (zones, areas, shelves, etc.) when packing the orders before delivery. Store Manager for PrestaShop v.2.44 and higher allows to export/import PrestaShop product warehouse location along with other product-related details to simplify the store administration process.
How Can PrestaShop Product Warehouse Location Be Exported To The CSV File?
To perform PrestaShop product warehouse location export – launch Import/Export Products Wizard in the available in the toolbar of Store Manager application.
For more convenience, beforehand, you can search products with the help of advanced filters by some criteria or even customize the existing ones with specific parameters and export only the needed list of goods.
Go through several steps of Products Import/Export Wizard: specify filename and location the data will be exported to, select fields delimiter characters, and choose the needed fields for export. At the Select Fields to be Exported step, the application allows adding the group of Warehouse Data fields for more handy product export. Thus, the merchant will receive the necessary information, such as a warehouse, the product is assigned to, its quantity in it, and the product warehouse location itself.

In the last step, you can choose the Open result file option to check the outcome immediately.
Detailed guide on how to export PrestaShop products can be checked here – Export PrestaShop PrestaShop using Store Manager
Add Product Warehouse Location And Upload The Existing Ones Via Import
In case you use Store Manager to export/import PrestaShop product warehouse location for product data transfer, for example, from one store to another, there are a few points to pay attention to.
Import of PrestaShop product warehouse location requires some obligatory fields to be properly added via Import/Export Wizard. Except for the product-related details you are going to upload, consider the following ones:
- Product identifier – select Reference, Product Name, Reference and Product Name, EAN or UPC, your products will be identified by Store Manager during import process;
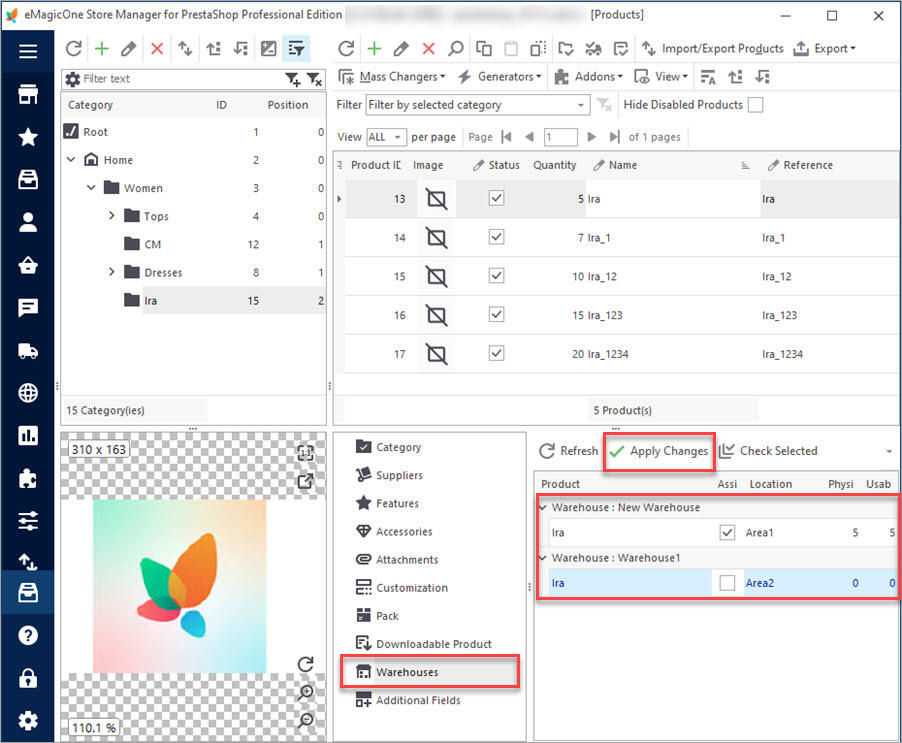
- Warehouse – specify the exact name of the warehouse you have created previously and where you are going to upload PrestaShop product warehouse location;
- Warehouse Location itself (the area, zone, shelf, etc. your products are or will be located in).

To import the PrestaShop product warehouse location with Store Manager, make sure you have created the warehouse beforehand.
Import Product Warehouse Location Settings
- Start Products Import/Export Wizard and run the usual steps, choosing the file you have previously prepared for warehouse location upload.
- Make sure you have indicated delimiter characters that are used as separators in your file.
- At the Assign .csv Columns to Database Fields, map the .csv file columns to the corresponding database fields. If they have identical names – they will be auto-filled. Pinpoint the Identify Methods depending on whether you are adding new PrestaShop products or updating the existing ones.
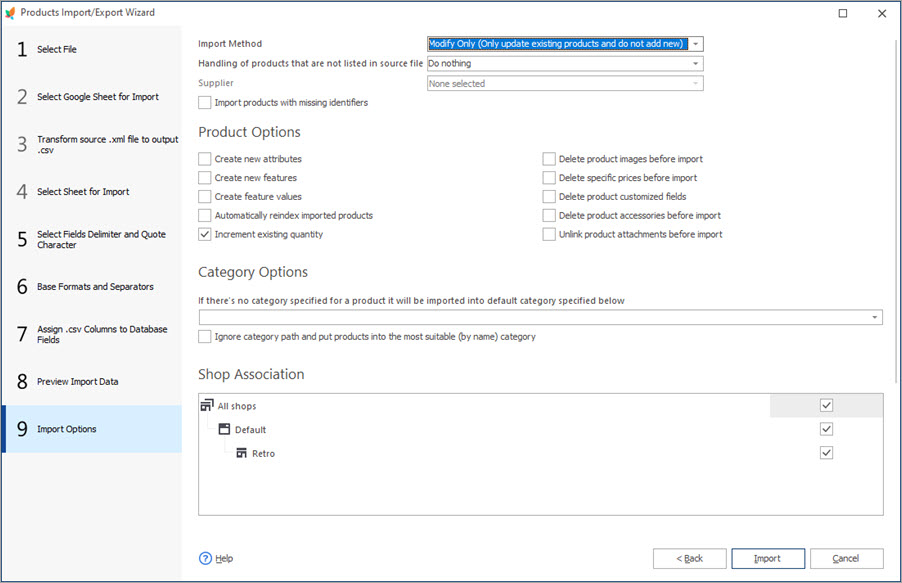
- At the Import Options step, pay attention to the Import Method.


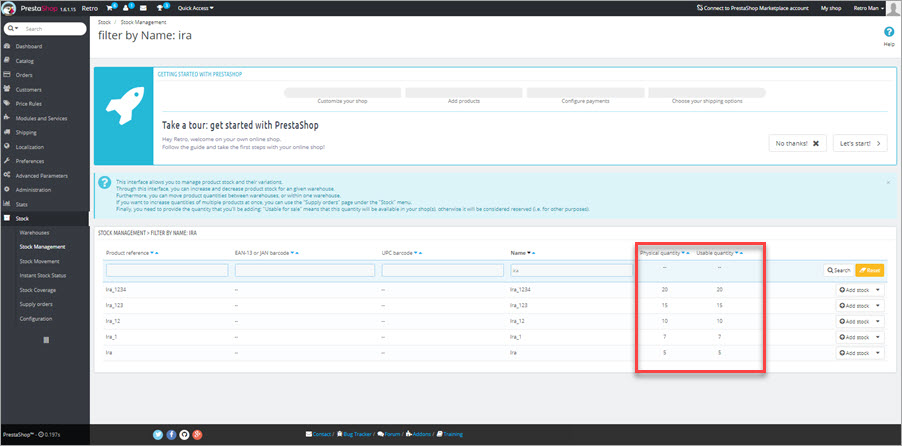
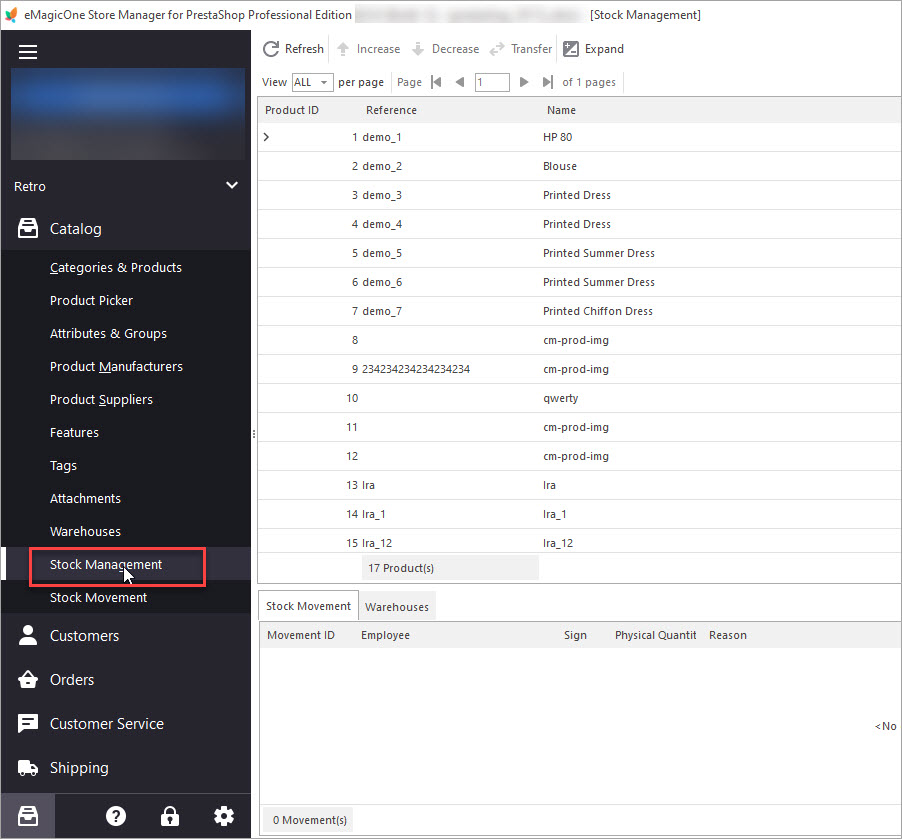
That’s it! After you are done with import – you may check the result in Store Manager.

Export/Import PrestaShop Product Warehouse Location In a Few Clicks Try FREE
Related Articles:
How to Enable Advanced Stock Management
Find out how to bulk add products to Advanced Stock Management system and what this system involves. Read More…
Mass Assign PrestaShop Products to Warehouses, Specifying Storage Location
Why products become out of stock and how to fix it? Read More…
Update PrestaShop Warehouse Stock Via Import
Get step-by-step instructions of executing PrestaShop warehouse update by import. Read More…
How to Transfer Stock Between PrestaShop Warehouses
Get detailed guides on how to smoothly transfer inventory to another PrestaShop store. Read More…
COMMENTS

