Shipping is an important part of your online business that influences the shopping experience and decides whether this or that client will buy from you next time. Delivery options, rates, terms should be planned and specified carefully depending on various conditions.
In order to create a PrestaShop carrier from Store Manager for PrestaShop, you need to follow the step-by-step instructions covered below in this post.
1)Add PrestaShop Shipping Carrier General Specifications
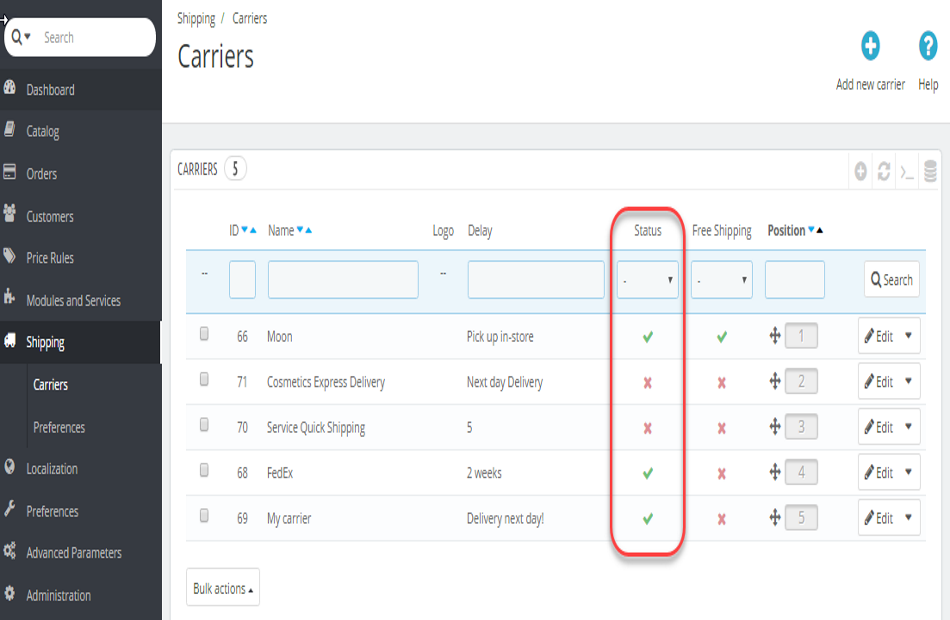
PrestaShop carriers are located and handled in the Administration->Carrier section of the application.
- Navigate to Administration -> Carriers and click on the
'Add Carrier'button on the toolbar or context menu. - Fill in general carrier details in the Main tab of the edit form. This is general info to describe the carrier.
- Company – insert name of shipper in this field. The name is public and will display for customers at the checkout. Provide a meaningful title to differentiate delivery methods.
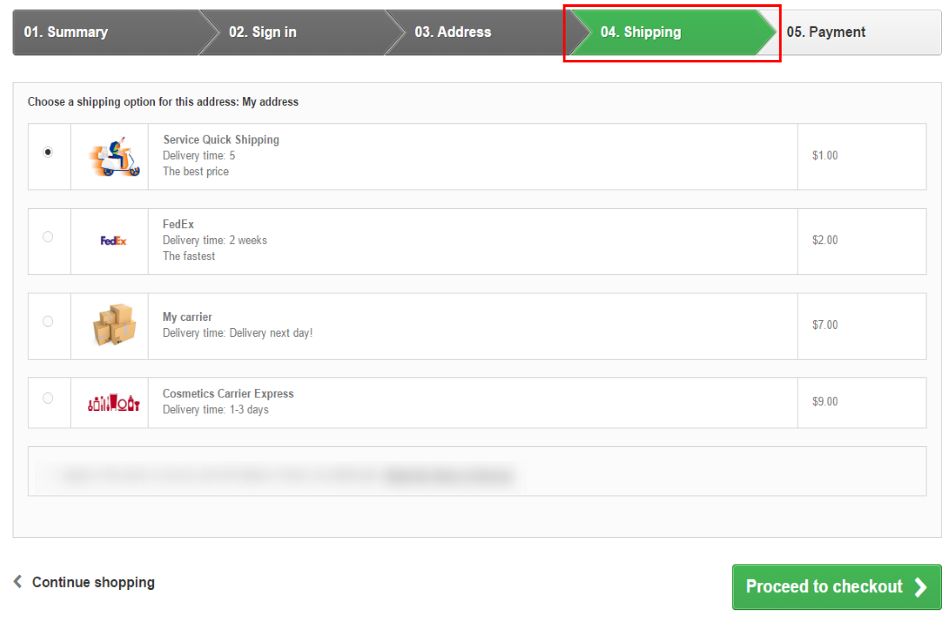
- Transit time – specify how long it will take for this carrier to bring products to customers. Customers can estimate delivery time, since it is displayed at the checkout page and decide which carrier to choose.
- Tracking URL – this field should contain URL provided by carrier for delivery tracking, for example, world-famous shipping service FedEx requires https://www.fedex.com/Tracking?action=track&tracknumbers=@. Symbol ‘@’ should be substituted by the tracking number, a customer gets after the order is completed.
- Grade – this field lets evaluate delivery speed for the carrier. Insert the value from 0 (very slow) to 9 (very fast).
- Apply shipping cost – enable the checkbox if delivery cost and product additional shipping fee should be applied.
- Tax – assign tax for the current PrestaShop shipping carrier if it requires local tax to ship the package or select “No tax” if you do not need to calculate any.
- Billing – decide on billing calculation behavior. PrestaShop allows handling billing according to order total price or total weight. If you choose According to the total price shipping cost of this PrestaShop carrier will be calculated on the basis of the order total. In case you prefer to differentiate cost by order weight, select According to total weight from the dropdown.
- Out-of-range behavior – on condition that no shipping cost is specified for required weight or zone, you can specify what PrestaShop will apply – the cost of the highest defined range or will disable the carrier.
- Maximum package dimensions – specify maximum weight, width, depth, and height admissible for this shipping carrier.
- Status – check this box to activate the carrier. In case you leave it unmarked, the carrier will not show at the checkout.
- Move to the Zone tab and choose locations the carrier will deliver parcels within. If a carrier does not work in some geographical regions, leave them unchecked, so customers from these areas will not see this shipping carrier in the list of available shippers.
- Set customer group associations for this carrier. If you enable groups, customers assigned to it will see the carrier in the list of available shippers. Contrariwise, if you want to disable PrestaShop shipping carrier for the definite group, do not select it in this step of carrier creation.
- Move further in the carrier configuration window and assign it to the necessary shops.
- Choose the carrier and hit the
'Carrier Fees'option on the toolbar. - Insert fee for each range per zone.
- Save the changes.


2) Set Zone, Customer Group and Shop Associations


3) Configure Ranges for Billing Cost
To change your customers for shipping, you should set price/weight ranges and specify the fee for each of these ranges. Depending on billing behavior, you have specified for the carrier, add rates in Price Ranges or Weight Ranges panel.
PrestaShop shipping carrier we configure takes shipping cost depending on weight, so we add weight ranges in Store Manager.

4) Set Shipping Fees
Once you have ranges created, you can specify fees for each range and differentiate them by zones.

5) Assign Created PrestaShop Carrier to Products
Customers will be able to choose this carrier for parcel delivery if it is assigned to ordered products. So after all the configurations are done, the carrier has to be ascribed to suitable products.
Bulk carrier assignment is possible from the Store Manager grid or in the process of import. If you select multiple products in Store Manager, open the Carriers tab in the lower grid, you will see all available shippers. Just enable the checkbox for the necessary one and will be assigned to these products.

Bulk carrier assign via import is outlined in this article – Assigning Carriers to PrestaShop Products in Bulk
Use Store Manager FREE to Handle Carrier Easily Get It Now
Related Articles:
PrestaShop Carriers Are Not Available At Checkout
Find out the reasons PrestaShop carriers are inactive and how to fix them. Read More…
Assigning Carriers to PrestaShop Products in Bulk
Check the ways to assign PrestaShop carriers manually or in bulk via import. Read More…
Easy Way to Handle USPS Shipping in PrestaShop
Get the list of functions and benefits of PrestaShop USPS Integration Addon. Read More…
Generate Barcode Labels for Your PrestaShop Products
Discover PrestaShop barcode labels types and learn how to create and print them. Read More…
COMMENTS

