PrestaShop attribute groups and attributes are flexible and productive means of catalog handling that let store proprietors swimmingly create product variants and consolidate different options of the same product within one page at the front-end. PrestaShop texture attribute intensifies attribute efficiency and refines the way product options are represented at the website. In other words, textures give your customers better idea of what they are going to buy, provide extra info on this or that product variant and, correspondingly, ensure better customer experience.
Not infrequently products you sell are not single-colour, for example, combine several hues and your task, surely, is to show visitors how exactly this or that product is coloured, what hue prevails, etc. ‘It is something complicated, it is too much for me’, you will think right away. You are wrong. It can be done in a matter of minutes with the help of PrestaShop texture attributes.
1) Create PrestaShop Attribute Group
In order to add attribute textures to product variations, you should at first create PrestaShop attribute group that will home required attributes. Attribute group and attribute management is being accomplished in Attributes and Groups section of Store Manager application.

On condition that multiple attribute groups are to be added, create them in bulk via Quick Add Group(s) option. Just input names of the groups to be created and determine attribute type (color since texture will be assigned further)
2) Upload Images to Display Attribute Textures
After necessary attributes have been added to attribute group, you can upload image files (textures) to them. This very image will be displayed at the front-end and will represent product option.
Important:
Store Manager does not facilitate texture import. PrestaShop textures cannot be assigned to attributes in bulk via import.To add texture to PrestaShop product attribute, perform the following steps:
- Add necessary attribute under the group.
- Click the folder icon under Texture image placeholder.
- Select the image from local folder and confirm its upload. When the image is uploaded, you can preview it in Texture field correspondingly.


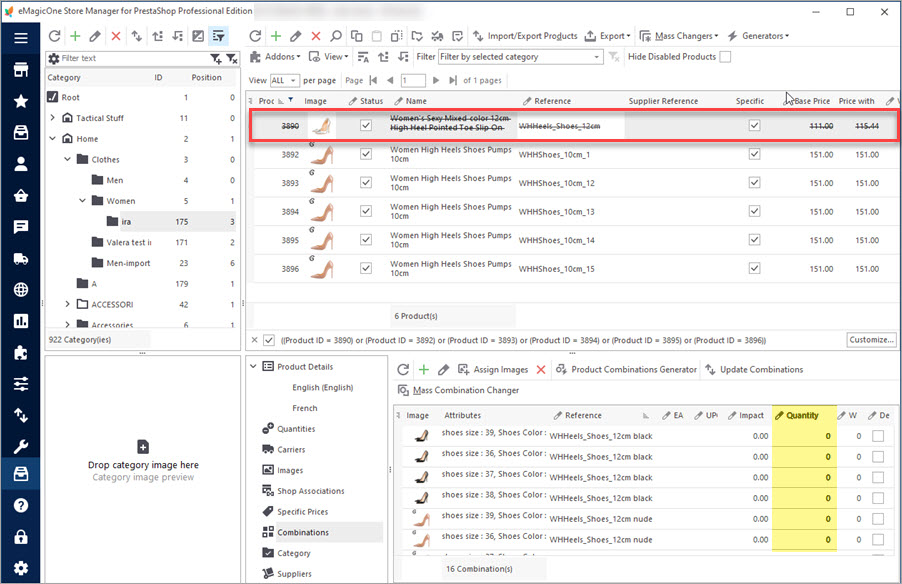
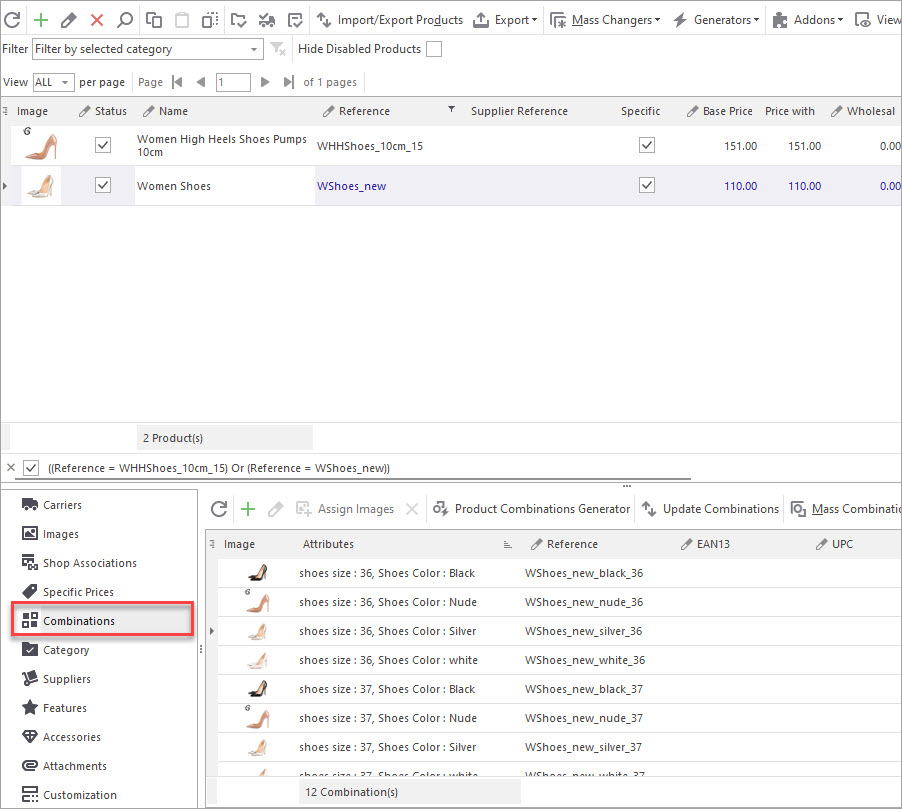
Create Combinations With This Attribute
In order to display textures on the product page, you have to create variations with the attribute, values of which are shown via textures. Combinations can be easily configured in bulk via generator, in the process of import or manually.

To get product image updated when certain combination is chosen at the product page, you need to assign appropriate picture to each of combinations.
Now you can check the product with texture at your store

Up and running PrestaShop store, you, as a rule, have abundance of tasks to cope with to set state-of-the-art product catalog and smartly organize product page. Make it customer-oriented and create more opportunities for shoppers visiting your website with PrestaShop attribute textures.
Download Store Manager for PrestaShop FREE Download
Related Articles:
PrestaShop Combination Import Pitfalls
Discover the solutions to most frequent troubles with PrestaShop combinations. Read More…
How to Export PrestaShop Attribute Combinations?
Find out how to export PrestaShop attribute combinations via export wizard. Read More…
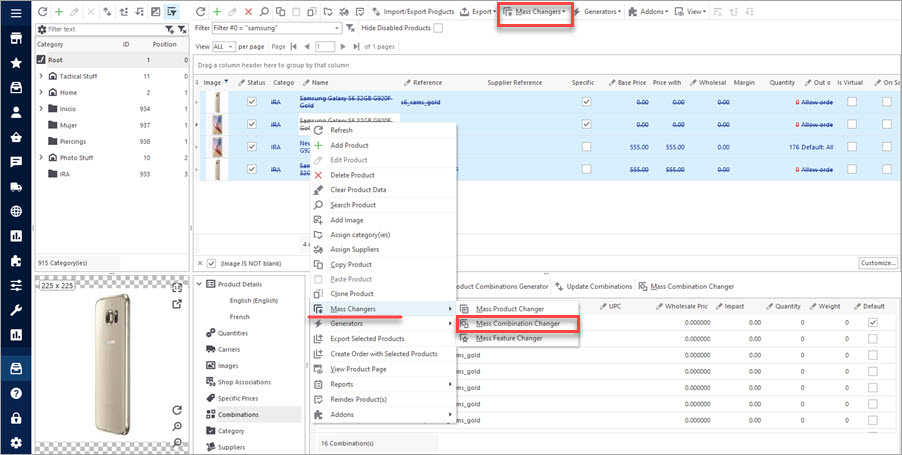
PrestaShop Mass Combination Changer
Find out what combination import consists in and how to accomplish it via PrestaShop mass combination changer. Read More…
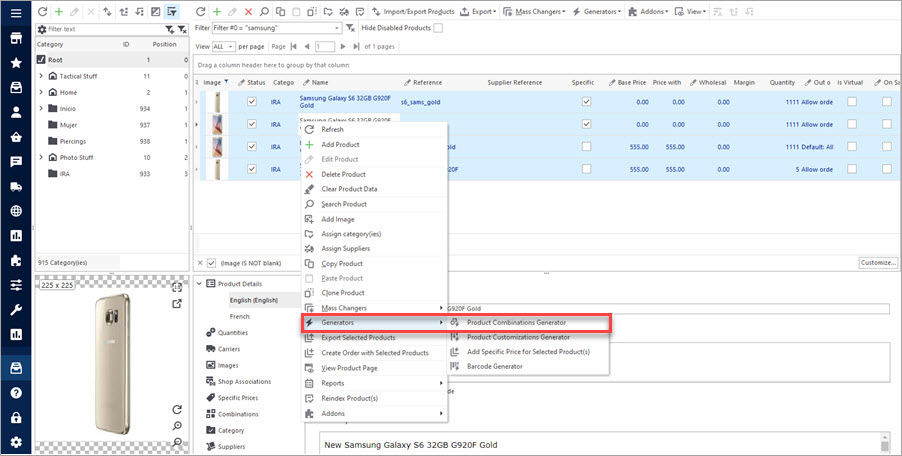
Create Combinations with Combinations Generator
Discover what are PrestaShop Combinations Generator functions and how to use them. Read More…
COMMENTS

