It is a known issue that after you configured PrestaShop carriers, they still don’t display at the checkout. In some cases, PrestaShop would show a customer the error message:
“There is no carrier that delivers to the address you selected”
or
“The product selection can not be delivered by the available carrier(s). Please amend your cart”.
In other cases, PrestaShop would display an incomplete list of carriers.
In this article, we’ve assembled a list of reasons that may cause the issue. Check them one by one if the PrestaShop carriers do not display at your store.
1. Is the Carrier Active?
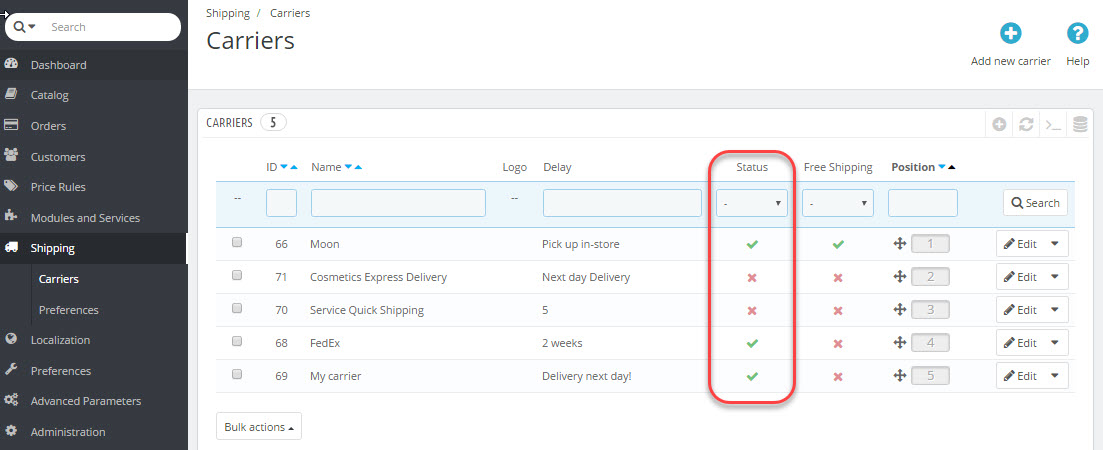
If the carrier is disabled, it will not be available for shipping. To check the status of the carrier, log into your PrestaShop back office and go to Shipping > Carriers. If the carrier is disabled, click the check box, expand the Status drop down and select Yes.
2. Is the Correct Zone Assigned and the Country Enabled?
When you configure a carrier in PrestaShop, you are supposed to assign it to a zone where parcels should be delivered. If the carrier is not assigned to the zone that a customer’s address belongs to, it will not be shown as a delivery method at the checkout.
If the zone is associated and matches the customer’s address but PrestaShop carrier still does not show, check whether necessary countries are enabled for this zone. Navigate to Localization > Countries, select a corresponding zone from the dropdown and check inactive countries.

3. Is the Carrier Allowed for the Customer Group?
This detail might easily be overlooked, since you can have hundreds and thousands of customers belonging to various customer groups. If some customer belongs to the group that is not served by the current shipper, it will not be offered as a delivery method for this customer.
Consequently, customer group association matters and you should check:
- Which group current shopper belongs to (Customers->Edit Customer->Group Access).
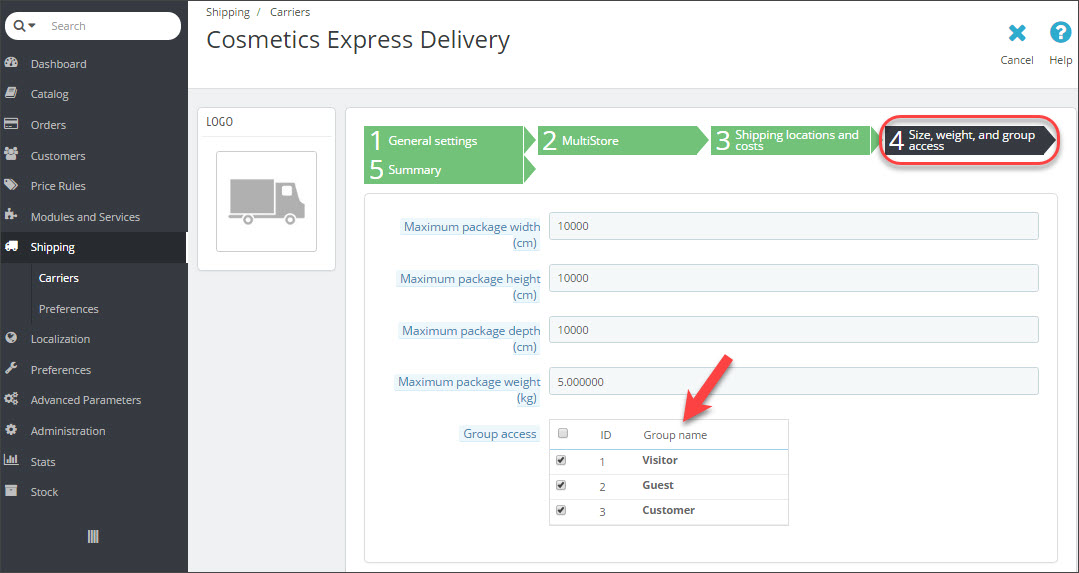
- Which groups the carrier works with (open carrier in edit mode->open Size, Weight and Group Access tab->check Group Access).
4. Are Weight and Price Ranges Specified?
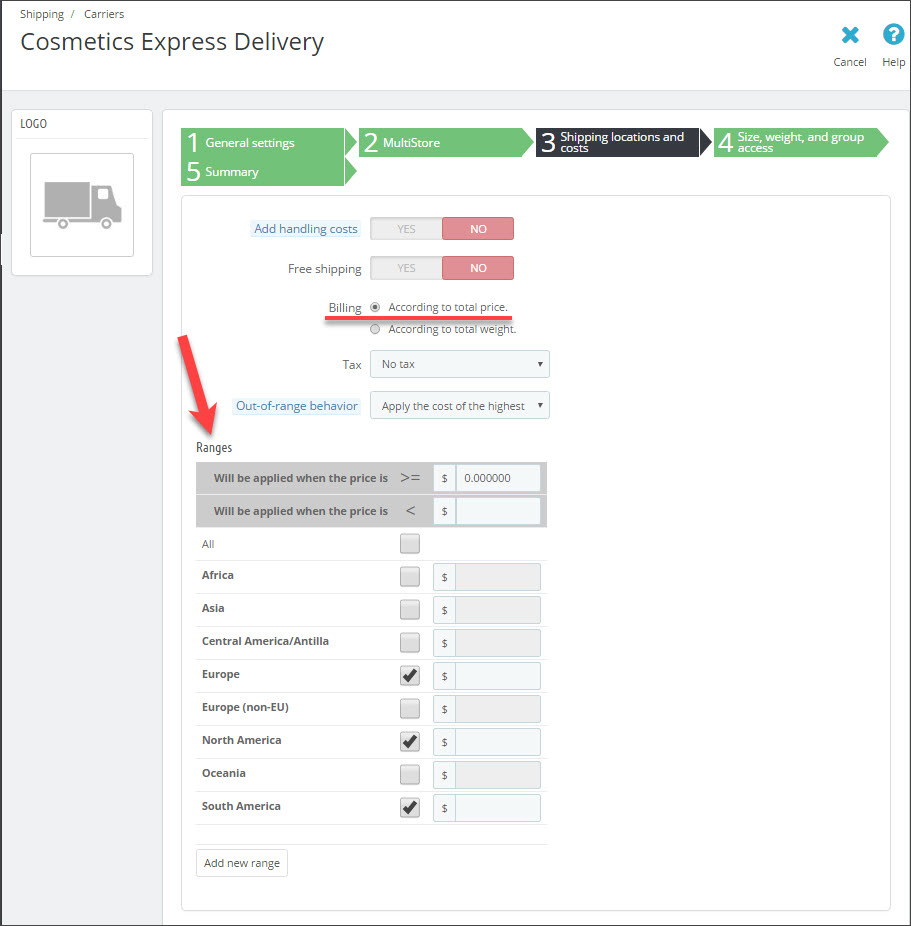
Creating PrestaShop carrier you usually define billing cost for each by one of criteria: order price or weight. Having selected a suitable method, you need to create ranges and set prices for them. In case ranges are not created, “The product selection can not be delivered by the available carrier(s). Please amend your cart” message will display at shipping step for customer.
To fix the inconvenience, add weight/price ranges for the desired carriers. To do so, enable carrier editing, switch to the “Shipping locations and costs” tab in the wizard, and create at least one range.
5. Are Package Dimensions Within the Range?
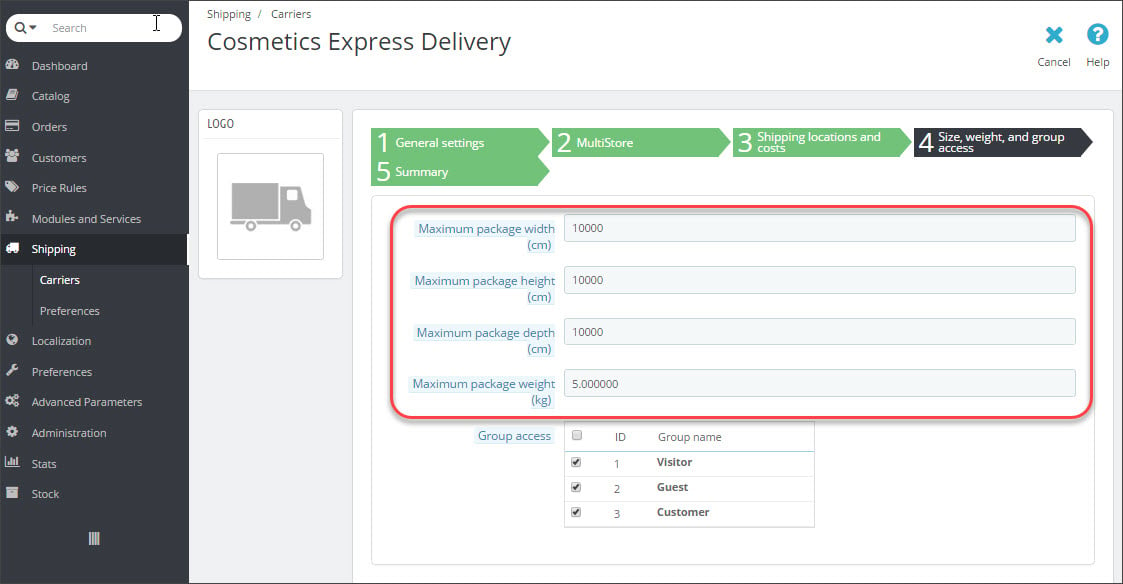
If all above listed settings are configured properly but still PrestaShop carrier does not display at the checkout, you have to compare package dimensions with maximum dimensions PrestaShop carrier can handle. If package goes beyond these limits, carrier can’t ship it and, respectively will not display as delivery method.
To check maximum height, width, depth, weight of package, shipper can deliver to your customer, open carrier in edit mode and move to “Size, weight and group access” tab.
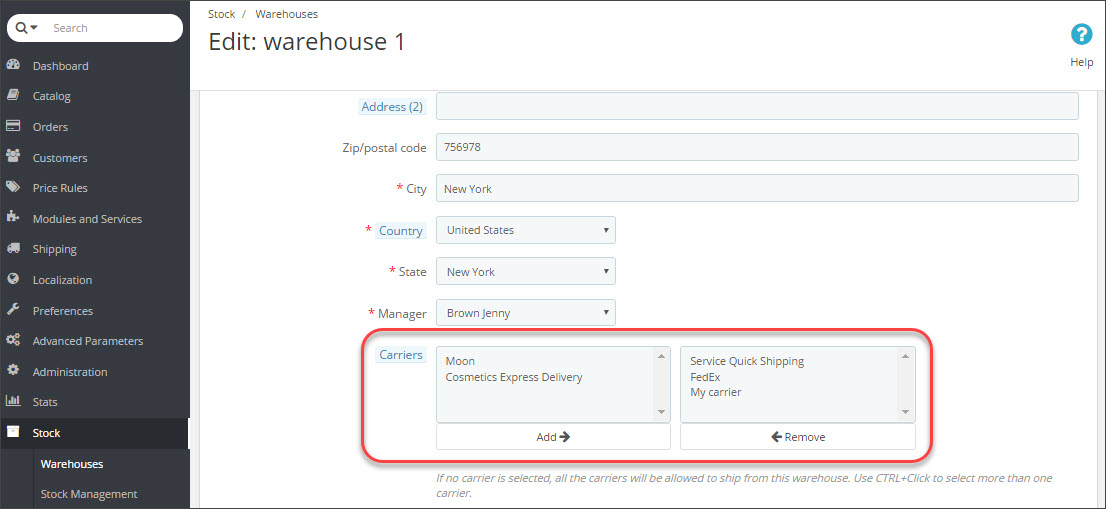
6. Is the Carrier Assigned to the Warehouse?
In case Advanced Stock Management is used for inventory tracking at your store, you should include this point into the checklist. Due to PrestaShop requirement, carrier must be activated for the warehouse, if product quantity is being handled via Advanced Stock Management.
Contrawise, no delivery methods will display. “There is no carrier that delivers to the address you selected” message will show for customers and they will not be able to complete the order process. To solve this, just check warehouse associations and make sure necessary carriers are linked (Stock->Warehouses->Edit Warehouse->Carriers).
Important:
In case no carrier is associated with a product in PrestaShop, all available at the store carriers will be shown at the checkout for this product.
In order to make carrier setup less time consuming and get delivery methods displayed instantly, check the points we have covered and consider them in advance.
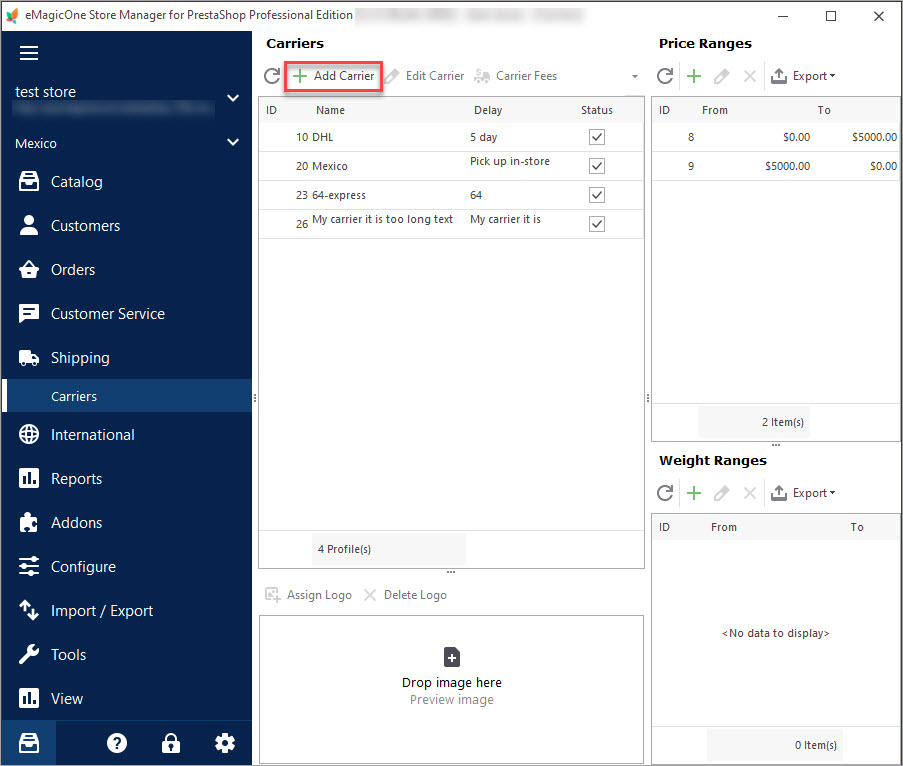
Create Shipping Carriers and Assign them in Bulk via Store Manager for PrestaShop
Try FREE
Related Articles:
PrestaShop Carrier. How to Create Shipping Carriers
Use this guide to create PrestaShop Carrier (set shop associations, shipping fees and assign carrier to products). Read More…
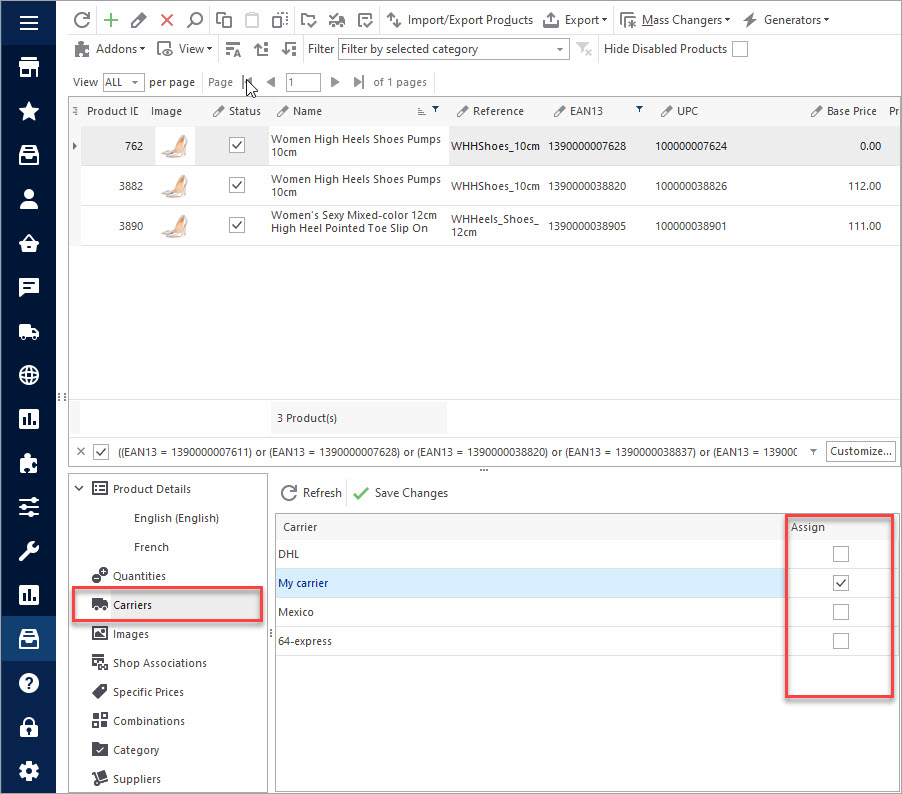
Assigning Carriers to PrestaShop Products in Bulk
Assign PrestaShop shipping carriers to products manually or set up massive assign via import. Read More…
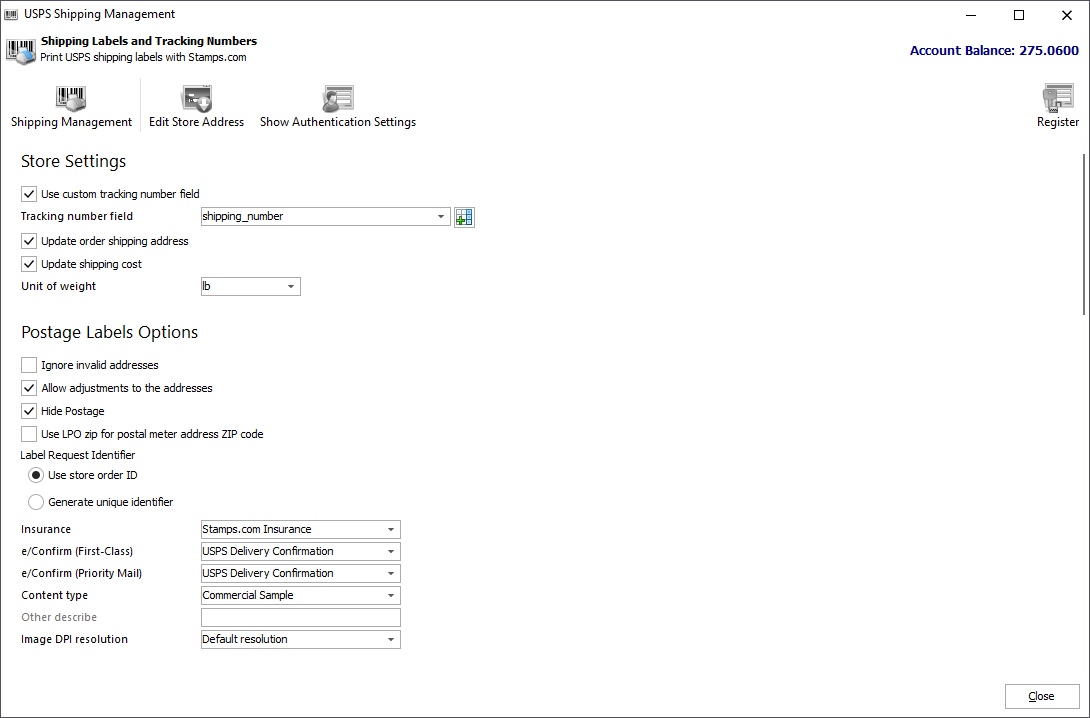
Easy Way to Handle USPS Shipping in PrestaShop
Get the list of functions and benefits of PrestaShop USPS Integration Addon. Read More…
Generate Barcode Labels for Your PrestaShop Products
Discover PrestaShop barcode labels types and learn how to create and print them. Read More…
COMMENTS
As the developers of third-party solutions for PrestaShop, we agree that discovering a reason for carriers not showing correctly is time-consuming and requires a lot of manual checking. It would be easier if the error messages were more informative and helpful in fixing the issue. What we and you could do is submitting an improvement request on the PrestaShop official forum.


This didn’t fix the problem. It is unbelievable that an issue like this exists and has what appears to be no resolution that actually works and this renders Prestashop completely useless if you are also selling to international buyers. This should NOT be so difficult to setup..